
 Español

How to paint skin on miniatures
- 06/30/2026 17:36:51
- Home , Assembly and Painting Guides
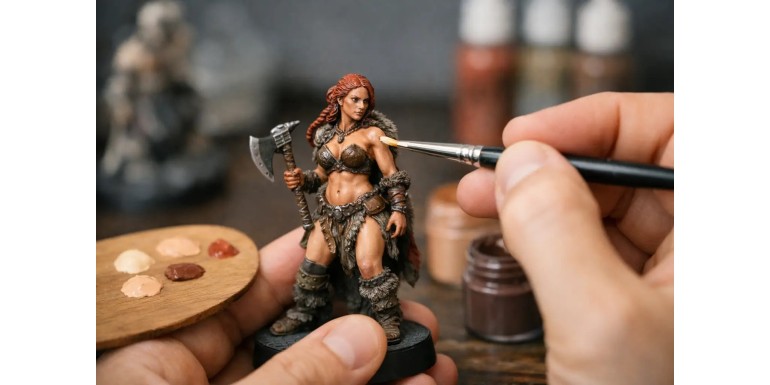
Skin is often the element that gives a miniature away the moment you look at it closely. You can have immaculate armor, beautifully blended metals, and a highly convincing base, but if the face looks flat, grayish, or overly pink, the figure loses its life. That is why learning how to paint skin on miniatures makes such a massive difference, especially on character models, skirmish warbands, or armies with a lot of exposed flesh.
The good news is that you don’t need impossible paint mixes or competition-level techniques to achieve a solid result. What you do need is to understand three key pillars: the base tone, the light direction, and the color temperature. When these three pieces click together, the skin stops looking like paint applied to plastic or resin and begins to truly blend into the miniature.
How to Paint Skin on Miniatures: A Consistent Method
If you are looking for consistency, the most useful approach is to work with a repeatable process. Not necessarily the absolute fastest or the most elaborate, but one that you can apply just as easily to a unit of infantry as to a simple bust. A reliable core recipe works exceptionally well: base coat, shadows, midtone recovery, and final highlights.
-
The Base Coat: This should be neither too light nor too saturated. A very common mistake is starting with a highly vibrant "flesh" color, assuming a wash will fix it later. While it occasionally works, it often leaves an orange or muddy finish. It is usually much better to start with a slightly desaturated, muted midtone and build up from there.
-
The Shadows: It is also best not to resolve shadows using only dark brown or black. Human skin possesses subtle undertones, and an overly neutral shadow can kill the sense of volume. For warm skin tones, a shadow with a touch of red, violet, or reddish-brown typically yields better results. For cold or pale skin tones, a hint of violet or gray works much better than a simple brown.
-
Midtone Recovery: After shading, reclaiming your midtone is the step people skip most often—yet, ironically, it’s the one that improves the final result the most. If you only apply a base coat, a wash, and a highlight, the transition looks jarring. By reapplying the base color to the cheekbones, forehead, nose, shoulders, or primary muscles, you restore order to the volumes before wrapping up with the highlights.
-
Final Highlights: These should be applied with restraint. On a 28mm or 32mm face, you don't need to illuminate half the surface with an almost-white tone. It is enough to hit the key focal points: the bridge of the nose, the tops of the cheekbones, the chin, knuckles, collarbones, or the tips of the fingers. Less paint, better placed, creates a far more believable result.
The Primer Color Changes Everything
While primer choice often comes down to personal preference, it significantly dictates how your skin tones behave. Over a black primer, skin tends to lose its luminosity and requires more layers to avoid looking dull. Over white, flesh tones can look stark and chalky if you don’t manage your opacity carefully. A neutral gray or a light bone/off-white primer usually offers a much more forgiving starting point.
If you work with thin layers and properly thinned paint, a light primer makes the entire process much easier, particularly on tiny faces. However, if you prefer harsh contrasts and gaming miniatures with high readability from a distance, a darker base coat can help. There is no single correct answer; it depends entirely on the size of the miniature, the style you are aiming for, and the amount of time you want to invest.
Pale, Tanned, and Dark Skin: It’s More Than Just Lightening or Darkening
When discussing how to paint miniature skin, people often oversimplify color choices. It isn't just a matter of taking the exact same recipe and raising or lowering the brightness. Every skin type varies in both temperature and saturation.
-
Pale Skin: This works best when you avoid pure white for your highlights. Lightening your mix too much with white leads to a chalky finish. It looks far more natural if you highlight using a light flesh tone, ivory, or a mix with a subtle pink undertone. Additionally, adding a soft glaze of red to the cheeks, nose, or elbows can prevent the miniature from looking like a lifeless doll.
-
Tanned or Medium Skin: This thrives on earthy bases with hints of yellow, red, or even a touch of olive. The usual pitfall here is making the shadows too black, which makes the facial features look overly harsh. A deep, warm brown almost always blends better. The highlights should step up in brightness, but without washing out the warmth of the overall look.
-
Dark Skin: This requires even greater care regarding undertones. Many painters try to resolve dark skin with a very dark brown followed by an aggressive highlight, resulting in a finish that resembles varnished wood. What works best is keeping a rich, deep base and building highlights with controlled warm tones. Sometimes, a more saturated highlight—rather than a lighter one—provides better readability. A touch of mahogany, reddish leather, or warm brown can inject life without breaking the overall tone.
Where to Place Shadows and Highlights
When painting skin, placement matters far more than the exact paint recipe. A well-placed highlight will always look better than a perfect color mix applied without intent.
As a general rule, light should hit the forehead, the cheekbones, the tip and bridge of the nose, the chin, and the upper lip. Shadows belong under the cheekbones, beneath the nose, inside the eye sockets, under the lower lip, and across the neck.
On arms and legs, think in terms of cylinders and flat planes. The biceps or thighs catch light at the top and darken toward the bottom. Fingers, knees, elbows, and tendons benefit from a fine, precise highlight rather than a quick drybrush. For highly muscular fantasy miniatures, you can exaggerate this contrast; for historical figures or realistic characters, it is better to keep it restrained.
This also depends heavily on scale. At 75mm, you can afford incredibly smooth transitions and extra nuances. At 28mm, overall readability matters much more than microscopic detail. From a tabletop viewing distance, skin with clear, bold contrast always reads better than a highly subtle blend that can only be appreciated from two inches away.
Glazes, Washes, and Layers: When to Use Each Technique
Washes are highly useful tools, but they shouldn't carry the weight of the entire project. They are great for quickly definition-marking recesses on rank-and-file troops or establishing an initial shadow. The issue arises when they are allowed to pool and dry across flat surfaces like faces or torsos, staining everything uniformly. That is exactly where skin loses its freshness.
Thin layers (layering) remain the most reliable method for building up realistic skin. They allow you to correct mistakes, modulate transitions, and decide exactly how much contrast you want. While they require more patience, they offer unparalleled control. For the average tabletop painter, two or three well-considered layers yield a far cleaner result than a base coat followed by two heavy washes.
Glazes are exceptionally useful during the final stages. If the skin turned out too pale, a highly diluted red or brown glaze can restore warmth and cohesion. If a shadow transition looks too harsh, a glaze using your midtone will instantly soften it. And if the miniature needs more character, subtle violet glazes under the eyes or reddish tints on the nose and knuckles do wonders for adding realism.
Common Mistakes When Painting Miniature Skin
1. Using the exact same recipe for every single figure. A barbarian baking under the sun requires a completely different approach than a vampire, an exhausted peasant, or an elf. Skin tells a vital part of the character's story, so it is always wise to adjust your palette to the context.
2. Bringing all highlights to the same final color. When every recipe ends with an ivory or off-white mix, drastically different skin tones end up looking identical.
3. The final finish. If the paint dries with a satin or glossy sheen, the skin can look greasy or artificial. A completely matte or very slightly satin finish is always more convincing.
4. Rushing the face. On most miniatures, the face is the primary focal point, yet it is often painted last and in a hurry. You don't need to spend an hour on every single face, but you must dedicate focused attention to it. Even in large armies, a cleanly executed face elevates the quality of the entire unit.
A Practical Method for the Gaming Table
If you want a reliable and reasonably fast tabletop result, work over a solid midtone base. Mark your shadows in the eyes, nose, mouth, and primary recesses using a darker, warmer tone. Reapply your base coat over the open areas, leaving the shadows trapped cleanly in the recesses. Next, bring up one or two highlights on specific, raised focal points. Finally, if the transitions look a bit chalky or disconnected, a very thin glaze of the original base tone will tie everything back together.
This works incredibly well for gaming miniatures because it perfectly balances time investment with tabletop readability. It doesn't aim for a display-case finish, but it guarantees a skin tone that looks alive, clean, and striking on the tabletop.
Furthermore, if you are using a paint range designed specifically for the hobby—with well-organized color triads and stable consistency—repeating this process across different projects becomes effortless. This is exactly where a specialized hobby store like Terrainandminis makes perfect sense for hobbyists: less guesswork, fewer improvisations, and immediate access to the exact tools and paints you need for the job at hand.
Ultimately, skin looks significantly better the moment you stop treating it as a generic color and start thinking of it in terms of volume, temperature, and character. Once you make that mental shift, you can stop relying on rigid recipes and start painting with true intention.






