
 Español

Playable Wargaming Terrain Guide: Build Tactical Boards
- 09/15/2026 09:30:39
- Home , Tabletop Terrain
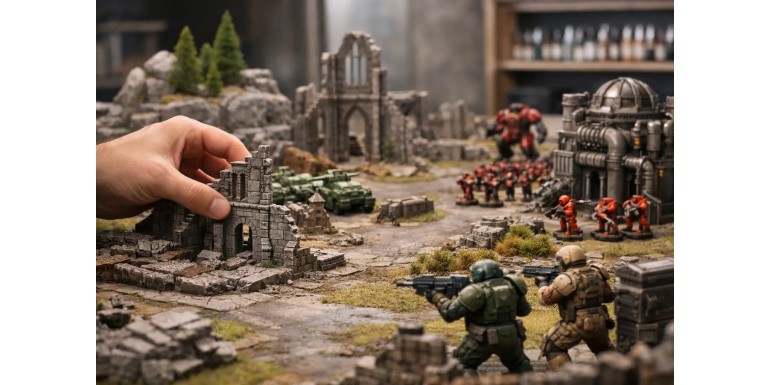
A table with great scenery changes a game before the first die is even cast. This wargaming terrain guide is designed to help you build battlefields that don't just look amazing in photos: they must offer tactical cover, clear movement options, balanced lines of sight, and durability for repeated play.
The most common mistake is buying or crafting isolated terrain pieces simply because they look impressive, only to discover later that they don't form a cohesive table. Before picking out a ruined cathedral, a forest set, or a hill, it pays to decide what types of games you want to play, at what scale, and on what size gaming mat.
1. Start with Table Functionality
Scenery performs two jobs simultaneously. On one hand, it immerses the game in a recognizable setting: a derelict industrial zone, a frontier desert outpost, a medieval village, or a sci-fi research facility. On the other hand, it fundamentally alters how miniatures move, shoot, and engage in combat. If a terrain piece fails at either job, it will end up sitting on a shelf.
Rules and Mechanics
First, consider your core rulebook. Some tabletop games classify terrain with precise mechanics—blocking Line of Sight (LoS), providing light cover, heavy cover, difficult ground, or dangerous terrain. Others leave more room for player interpretation. In both cases, defining which terrain rules each piece represents before the game begins prevents heated mid-game arguments.
Board Scale and Dimensions
Table size is equally critical:
-
Small Tables (e.g., Skirmish Games): A massive fortress or multi-story structure can easily dominate the board and stifle movement.
-
Large Tables (e.g., Full-Scale Armies): A few low barricades leave massive, open kill zones that favor long-range shooting.
Terrain proportion should always respond to battlefield dimensions, army mobility, and effective weapon ranges.
2. Choose a Theme with Room to Expand
A clear visual aesthetic ensures disparate pieces feel like parts of the same world. That doesn't mean everything must look identical:
-
Urban Tables: Gain interest through streets, ruins, shipping containers, fences, signs, and industrial debris.
-
Rural Tables: Combine fields, stone walls, forests, farmhouses, dirt tracks, and streams.
The key is picking a core visual palette while leaving room for modular expansions. For example, a palette of arid earth, grey stone, and muted vegetation allows you to represent deserts, steppes, ancient ruins, or devastated borderlands without replacing your entire collection. Neutral, multi-use terrain elements offer the best return on investment because they fit effortlessly into various campaigns and game systems.
Scale Verification
Scale requires careful pre-checking. A building that looks visually convincing alongside a 28mm miniature might be too short to hide light vehicles, or too cramped to fit standard 32mm display bases inside. Doors, windows, ladders, and walkways must be aesthetically believable while remaining spacious enough for miniatures to stand without falling over or getting stuck.
3. Build a Functional Core Before Specialty Centerpieces
For your first playable wargaming table, it is far more practical to gather several distinct categories of terrain than to spend your entire budget on a single massive centerpiece. You need pieces that block vision, low cover options, path-defining obstacles, and area terrain features like forests, swamps, or rubble zones.
A balanced core terrain setup should include:
-
2–3 Large LoS-Blocking Features: High rock formations, tall buildings, or broad hills.
-
3–5 Medium Cover/Objective Features: Small ruins, barricades, or rock outcrops.
-
4–6 Low, Scatter Terrain Items: Walls, fences, crates, sandbags, or pipelines.
-
2 Area Terrain Zones: Woods, swamps, or crater fields that modify movement.
This variety allows you to reconfigure layouts so every match feels unique. Furthermore, small scatter terrain fills awkward dead zones, balancing deployment zones when one side of the board feels overly exposed.
4. Table Layout: Beautiful vs. Fair Play
Arranging all your scenery along the table edges while leaving a giant open field in the middle makes for clean photography, but heavily favors long-range shooting armies. A playable table needs sightline breaks, tactical decision points, and sufficient cover so melee units can advance without being wiped out on Turn 1.
Avoid perfect symmetry. Facing two identical ruined buildings directly across from each other works for strict competitive play, but battlefields feel far more natural with irregular terrain clusters.
The Functional Balance Check
If one player has a sturdy ruin to anchor their artillery, the opposing player should have a comparable tactical alternative—even if it is a rocky outcrop or a crashed drop pod.
Before placing models, inspect the board from both deployment edges. Ask yourself:
1. Are there unobstructed firing lanes stretching end-to-end?
2. Do assault units have protected advance routes?
3. Can a central objective be contested without turning into an unassailable fortress?
Moving a single building ten centimeters often does more to balance a table than adding an entire box of new scenery.
5. Incorporate Verticality with Care
Vertical levels elevate tactical interest, but can introduce gameplay friction. A building with playable upper floors must feature flat, stable surfaces so models don't slide off at the slightest bump, along with clear rules for climbing, descending, and measuring vertical distances. If a piece fails these practical tests, it functions better as a solid, impassable LoS blocker.
-
Gentle Hills: Extremely versatile. They don't hinder movement excessively, add visual volume, and allow objective placement without complex rules.
-
Sheer Cliffs & Industrial Platforms: Add dramatic flair, but support ledges should be limited so they don't turn into un-assailable sniper nests.
6. Durable Scenery Materials for Real Games
Material selection depends on budget, hobby time, and storage requirements:
-
Resin: Provides high surface detail and heavy weight, which keeps small scatter pieces from shifting during play.
-
Plastic: Lightweight, durable, and ideal for modular buildings.
-
MDF (Medium-Density Fibreboard): Great for large, affordable structures, though edges require proper sealing to blend in seamlessly.
-
XPS Foam (Extruded Polystyrene): Essential for scratch-building hills, walls, and rocky bases. It cuts easily and takes texture well, but requires protective sealing against impact damage and solvent sprays.
-
Cork, Textures & Gravel: Excellent for rocks, fallen masonry, and breaking up flat surfaces.
Stabilizing Bases
Never underestimate terrain bases. Tall, lightweight pieces tip over easily, whereas bases that are unnecessarily large take up excessive tactical footprint. Chamfering or beveling base edges, adding weight to the underside, and texturing consistently improves both physical stability and visual appeal.
7. Painting Scenery for Tabletop Clarity
Wargaming scenery does not require the micro-detailing of a display miniature. At tabletop distance, what works best is a clear reading of volumes, structural materials, and playable zones. A solid primer coat, rich base colors, heavy drybrushing, and selective washes yield outstanding results without turning every ruin into a multi-week project.
Maintain a shared color palette across your collection. Standardizing your ground tones, dust shades, rust effects, stone colors, and foliage ties buildings from different manufacturers into a unified terrain set. Afterwards, add spot accents like hazards signs, graffiti, glowing lenses, or localized snow. Accent details should serve the environment's story without muddying the piece's physical shape.
Applying Realistic Environmental Effects
-
Snow Effects: Most convincing when accumulated in crevices, ledges, and sheltered spots—never spread as a uniform sheet.
-
Mud & Grime: Belongs near roadways, tracks, and low puddles.
-
Water Effects: Requires proper riverbed prep, leak-proof damming, and thin layer pours.
Each effect adds realism when applied strictly where it makes logical sense.
8. Modularity, Storage, and Long-Term Maintenance
Terrain collections grow quickly, so plan for storage early:
-
Stackable structures, demountable roofs, and removable trees simplify transport to gaming clubs.
-
Be cautious of over-modularity; excessive clips or tiny magnet joints can lead to fragile components. For pieces used weekly, structural durability beats extra features.
Group scenery by category in dedicated storage bins: buildings together, foliage together, linear walls together, and fragile centerpieces padded. Labeled bins shorten table setup times and stop loose trees from getting crushed under heavy ruins. Timely minor repairs—re-gluing a loose railing, touching up chipped paint, or adding PVA to loose flocking—drastically extends your terrain's lifespan.
Shopping at Terrainandminis.com makes it easy to source matching terrain kits, paints, texture pastes, static grass, and special effects in a single order, keeping your palette and project consistent when building a table in phases.
A great wargaming table is never truly finished. Leave a section of terrain modular, a road network open to expansion, or an empty plaza where a new objective feature can fit later. That open space ensures every addition becomes part of a battlefield that keeps telling stories, game after game!






