Español

How to Paint OSL on Miniatures: Step-by-Step Guide
- 09/28/2026 08:58:19
- Home , Assembly and Painting Guides

A blue rune casting a warm glow over a hand, plasma rifle energy reflecting off power armor, or a flickering torch staining a dungeon wall orange—capturing these dynamic moments is the core goal of Object Source Lighting (OSL).
OSL doesn't simply mean painting a bright color next to a light source. It is the art of creating the illusion of direction, intensity, and a real light source interacting with nearby surfaces.
When executed correctly, OSL turns a standard painted miniature into a atmospheric masterpiece. However, it can quickly expose flaws in your planning if done incorrectly. The good news? You don't need an airbrush or master-level painting techniques. Success comes down to controlling where you place your color and maintaining dark enough shadows to make the light source pop.
What Makes an OSL Effect Look Believable?
An OSL effect succeeds when a viewer immediately understands three things without explanation:
1. The exact source of the light.
2. Which surfaces are directly receiving that light.
3. Which areas remain cast in shadow.
If every part of the miniature is painted with equal brightness, the light loses its localized feel. Likewise, if the reflected light is brighter than the original source, it breaks the illusion of luminosity.
Rule of Thumb: The light source must always be the brightest—and usually the most saturated—point of color. The cast light should gradually become dimmer, less defined, and less saturated the further it travels from the source.
For example, a glowing green power crystal might feature a near-white center. The leather gauntlet holding that crystal will absorb a muted green, while the cloak trailing behind might receive no light at all.
Avoid treating OSL as just a smooth gradient. You can paint flawless transitions, but the effect will still fail if you illuminate surfaces that are physically facing away from the light. Furthermore, when painting gaming miniatures, it helps to slightly exaggerate the contrast. Nuances that look subtle under a desktop painting lamp can easily vanish at tabletop distance.
Setting Up the Scene: Planning Your OSL
Before applying any bright paint, determine the precise direction of your light source and perform a quick mock-up with a desk lamp:
1. Position your desk lamp at the exact angle you want the light source to originate from on your model.
2. Observe which edges, volumes, and textures catch the light.
3. Take a quick reference photo.
While you don't need to match real-world physics down to the pixel, this quick test prevents you from painting random highlights in places that shouldn't be illuminated.
Paint the Miniature First
It is generally best to complete the rest of your miniature before applying OSL. Painting OSL over an already finished palette—where the armor, leather, cloth, metal, and base have their shadows and midtones established—allows you to glaze the light directly over the underlying textures. Starting with the OSL glow first often forces you to constantly repaint and correct surrounding areas later.
Choosing the Right Light Source
Your choice of light source dictates the difficulty of the project:
-
Small & Demanding Sources: Lenses, computer screens, gems, or helmet visors require tiny, precise areas of light.
-
Beginner-Friendly Sources: Torches, magical flames, glowing bunker doors, or spaceship engines allow for wider transitions and are much more forgiving to practice on.
Textured surfaces—such as brickwork, armor plates, pipes, or rough rock—help break up the light and make the OSL effect register much more clearly to the human eye.
Essential Materials and Color Choices for OSL
You don't need a complex setup to achieve great OSL effects. All you need are well-diluted acrylic paints, a wet palette, a fine-tipped brush, and a bright tint for your final highlights.
Glazing is the primary technique here: applying translucent layers of paint that gradually shift the underlying tone without completely obscuring the details beneath.
-
Warm Light Sources (Torches, Fire, Lava): Use yellows, oranges, warm reds, and ivory.
-
Cool Light Sources (Plasma, Magic, Tech): Turquoises, blues, bright greens, and cool whites work best.
The Problem with Pure White Paint
Pure white should be reserved almost exclusively for the core of the light source or tiny points of extreme reflection. Painting an entire sphere flat white makes it look like an unprimed component rather than a glowing object. Instead, mix a small amount of white or ivory into your main color. This creates a cohesive highlight while preserving the color’s identity.
Using Fluorescent Paints
Fluorescent paints can add an intense pop to sci-fi energy weapons or ultraviolet effects. However, fluos will not fix incorrect light placement. Because they tend to have low coverage, they require a bright base coat underneath. Use fluorescents as a final accent, not as a replacement for glazes, contrast, and proper shadowing.
For terrain and scenery projects, extra elements like pigments, water effects, or tinted clear resins can enhance the look, but your paintwork should carry the effect on its own.
The Layering Method: From Shadows to Source
Follow this step-by-step layering approach to build a convincing light effect:
[Step 1: Ambient Glaze] ➔ [Step 2: Directional Highlights] ➔ [Step 3: Paint the Source] ➔ [Step 4: Edge Restoration]
1. Map Out the Light Area
Start by defining the illuminated zone using a very thin glaze of your light color. This first layer should be subtle—think of it as ambient color rather than active light. If you are painting a blue energy sword, lightly tint the fingers, the edge of the vambrace, and the closest side of the torso.
2. Build Up Facing Surfaces
Reinforce the planes directly facing the light source. Apply progressive glazes over smaller and smaller areas, allowing the previous layer to remain visible around the edges. Applying five thin, transparent glazes is always better than applying one thick layer that is difficult to undo.
Pro Tip: If your paint leaves rings or tidemarks, it is either too thick or your brush is holding too much water. Wick excess moisture off on a paper towel before touching the brush to the miniature.
3. Paint the Light Source Itself
Once the ambient halo is established, paint the light source with maximum contrast:
-
Reserve the darkest shade of your chosen color for the recesses or edges.
-
Apply a bright midtone across most of the surface.
-
Place your brightest highlight at the focal point of maximum emission.
For a flame, the brightest point is typically near the base or inner core; for a lens, it depends on the angle of reflection you want to create.
4. Restore Lost Edges
Finally, redefine any structural edges that got washed out during the glazing process. A sharp edge on armor, the separation between fingers, or a crisp line on a stone wall may need a thin edge highlight in its original, un-lit color. This doesn't ruin the OSL—it restores legibility and grounds the miniature in reality.
Direction, Distance, and Surface Materials
+-------------------+-----------------------------------+----------------------------------+
| Light Distance    | Surface Material                  | Resulting Effect                 |
+-------------------+-----------------------------------+----------------------------------+
| Close / Point     | Polished Metal                    | Sharp, bright, pinpoint specular |
| Distant / Large   | Matte Cloth / Leather             | Soft, diffused, wider spread     |
| Broad (Fire/Lava) | Textured Stone / Wood             | High-contrast highlights on edges|
+-------------------+-----------------------------------+----------------------------------+
-
Distance: A light source placed close to a surface produces a small, intense halo with rapid transitions. A large source (like a bonfire or a crackling lava fissure) casts light over a much wider area of both the miniature and its base.
-
Materials: Polished metals reflect sharp, distinct specular highlights, often appearing in areas separated from the main beam. Matte cloth and leather absorb light softly, resulting in smooth, diffuse glows. Stone and timber catch light along raised grains and sharp edges, while wet surfaces generate intense, hard reflections.
OSL for Tabletop Terrain and Scenery
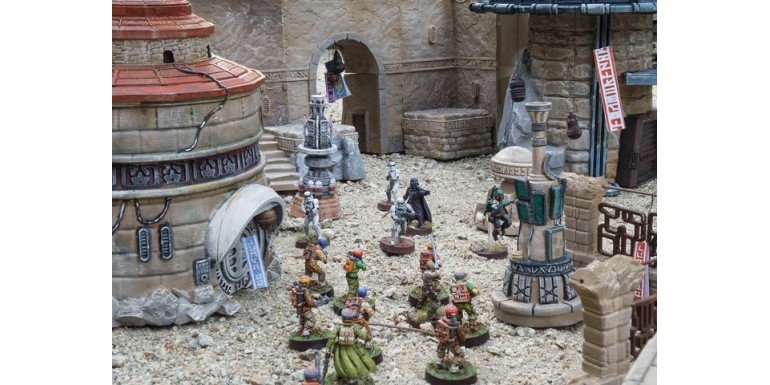
In terrain painting, OSL is a powerful tool for directing player focus across a gaming table or diorama. An illuminated terminal, glowing windows in a ruined building, or an arcane portal instantly become visual focal points.
Keep color palette limits in mind: if every building on your board glows with a different primary color, your terrain loses visual hierarchy. Stick to one or two consistent color temperatures across your terrain pieces for a unified look.
Common OSL Mistakes (And How to Fix Them)
1. Over-illuminating the Model: The most frequent error is extending the light color into areas that shouldn't receive it. If you've gone too far, paint back into the area using thin glazes of the base color. Don't try to cover it in one heavy layer—subtle glazes preserve the transition and avoid chalky build-up.
2. Creating a White "Halo": Projected light is rarely white; it carries the hue of the light source and diminishes as it moves away. Keep white paint reserved strictly for the core interior of the light source or tiny pinpoint reflections.
3. Clashing Light Sources: Combining two red eyes and a bright blue power sword can look fantastic, but their respective light pools must remain distinct or blend logically where they overlap. When painting smaller gaming miniatures, simplifying your light scheme almost always yields cleaner results than trying to paint every possible light bounce.
Practice Makes Perfect
The best way to master OSL is to choose a single miniature or small terrain piece with an unambiguous light source and practice:
-
A space marine helmet with a glowing visor.
-
A wall torch mounted on dungeon scenery.
-
An industrial generator or a plasma pistol.
Take progress photos between glazing layers. Looking at your model through a camera lens immediately reveals whether your light source makes sense at a glance.
At Terrainandminis.com, you'll find a wide selection of paints, miniatures, and scenery designed to work seamlessly together for your next hobby project. However, the most important tool will always be your control of light: start small, protect your shadows, and make sure your brightest light source has a clear reason to shine. When those elements click, even a simple OSL effect brings your miniatures to life before they ever hit the gaming table.