
 Español

Airbrush or Brush for Miniatures: Which One Should You Use?
- 09/11/2026 09:09:45
- Home , Assembly and Painting Guides
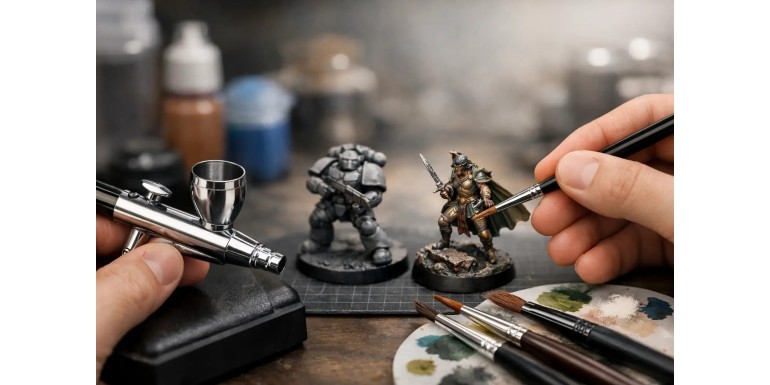
When it comes to airbrush or brush for miniatures, there is no single tool that does everything best. A miniature can have beautifully blended armor created with an airbrush and still need a fine brush for the face, trim, weapon, and other details to remain readable from across the gaming table.
The best miniature painting setup is often not about choosing between an airbrush and a brush. Instead, it is about understanding what each tool does best and knowing when to switch between them. Choosing the right tool can save you time, reduce unnecessary layers of paint, and make large painting projects much more enjoyable.
A brush remains the essential tool for miniature painting. An airbrush, however, can dramatically speed up priming, basecoating, volumetric shading, and smooth transitions. The right choice depends on what you paint, the finish you want, your available workspace, and—most importantly—how many miniatures you plan to paint.
Airbrush vs Brush for Miniatures: What's the Difference?
The biggest difference between an airbrush and a brush is not that one produces better results. It is the type and size of surface each tool allows you to control.
A paintbrush for miniatures deposits paint exactly where you place the tip. This makes it ideal for painting eyes, facial features, weapons, straps, symbols, trim, edge highlights, and other small details. You can also use a brush for controlled washes, glazing, drybrushing, and corrections.
An airbrush for miniature painting sprays a fine mist of paint over the surface. This makes it excellent for covering large areas evenly and creating smooth transitions between shadows, midtones, and highlights. The trade-off is that you need to protect areas you do not want to spray.
For an individual fantasy miniature covered in fabric, leather, metal, and small details, a brush can handle almost the entire painting process. For a vehicle, monster with large armor plates, infantry unit with a shared color scheme, or large piece of terrain, an airbrush can save considerable time from the very beginning.
Your workflow also changes depending on the tool.
With a brush, you can sit down, open a few paint pots, and start working through your colors. With an airbrush, you need to prepare your paint, check the pressure, ensure suitable ventilation, clean between colors, and clean the airbrush thoroughly after use.
That extra setup matters much more when painting one miniature than when painting twenty.
When Is a Brush Better for Miniatures?
A brush is the most versatile option for miniature painting, particularly when precision and detail are important. Learning how to thin your paint, control the amount of paint on the brush, apply thin layers, and place highlights correctly gives you fundamental skills that remain useful regardless of what other equipment you eventually buy.
Even painters who use an airbrush for most of their basecoats usually return to a brush to finish their miniatures.
A brush is often the better choice when:
- You are painting individual characters or small units.
- You need precise control over small areas.
- You have limited workspace.
- You paint only occasionally.
- You are still learning miniature painting fundamentals.
- You want to keep your initial investment low.
A practical miniature painting brush set does not need to be large. A good fine-detail brush, a medium brush for general painting, and an older brush for drybrushing can cover a surprising number of projects.
Cleaning is also straightforward. With the correct care for the type of paint you use, maintaining your brushes generally takes very little time.
A Brush Doesn't Have to Be Slow
One common misconception is that brush painting is always much slower than airbrushing. In reality, the difference depends heavily on the painting method.
Painting every miniature as if it were a competition or display piece will take a long time regardless of the equipment you use. For tabletop armies, a more efficient approach can include colored primer, clean basecoats, selective washes, and simple highlights.
A larger brush with a good tip can cover surprisingly large areas quickly while still giving you control around nearby details.
Drybrushing is another example. It remains extremely effective for terrain such as:
- Walls
- Ruins
- Rocks
- Wood
- Dirt
- Industrial surfaces
An airbrush can establish the overall shadows and color variation, but a drybrush can quickly pick out raised textures and edges.
When Is an Airbrush Worth It for Miniatures?
An airbrush for miniatures becomes especially useful when you need to cover large surfaces quickly or create smooth color transitions.
It excels at four main tasks:
- Priming
- Applying smooth basecoats
- Creating gradients
- Establishing large-scale volumes and lighting
On science-fiction armor, creature wings, large monsters, or vehicle hulls, an airbrush can create a transition from deep shadow to overhead light without leaving visible brush marks.
This can give you an excellent foundation before you begin painting the details by hand.
Airbrushing Is Excellent for Army Painting
One of the biggest advantages of an airbrush is consistency.
If an army requires every miniature to have the same blue, green, red, or sandy basecoat, an airbrush can cover large numbers of models with thin, consistent layers.
This is particularly useful for armies with:
- Large armor panels
- Smooth robes
- Large creature bodies
- Helmets
- Vehicles
- Repeated color schemes
For example, if you have dozens of miniatures that all require the same dark green basecoat, applying it with an airbrush can significantly reduce repetitive work.
This is where the airbrush vs brush for miniatures decision becomes less about which tool is better and more about which tool saves you the most time.
Airbrushing Terrain
An airbrush is also extremely effective for gaming terrain.
Large terrain pieces allow you to establish shadows, midtones, and highlights quickly. A hill, industrial building, ruined structure, or desert gaming board can receive broad tonal variation that would take much longer with a small brush.
You can then use washes, pigments, texture products, and drybrushing to add weathering and surface detail.
For large projects, the time saved can make an airbrush a much more worthwhile investment than it would be for painting a single character.
What Are the Disadvantages of an Airbrush?
An airbrush does not automatically make miniatures better.
Paint consistency, air pressure, distance, and technique all matter. If the paint is too thick, it can clog the nozzle. If the pressure is too high, you may get excessive overspray. If you work too close to the miniature, paint can accumulate on the surface.
An airbrush also requires suitable ventilation and appropriate protective equipment, particularly when working with primers or varnishes.
Masking Takes Time
Masking is another consideration.
If you want sharp stripes, panels, camouflage patterns, or geometric designs, you may need masking tape or masking putty to protect surrounding areas.
That can be worthwhile on a vehicle or large model.
On a small infantry miniature covered with pouches, weapons, straps, and other details, however, it may be faster simply to pick up a brush.
Airbrush Cleaning and Maintenance
Maintenance is another important part of owning an airbrush.
Dried paint in the nozzle or on the needle is a common source of problems. After a painting session, you should empty the paint cup, clean the appropriate components, and make sure the airbrush is ready for the next use.
This is not difficult once it becomes part of your routine, but it is important to understand before buying an airbrush for miniature painting.
An airbrush is a precision tool—not a maintenance-free alternative to a brush.
Airbrush or Brush for Miniatures: What Does It Cost?
The initial investment is another major difference.
Starting with brushes is relatively simple. You need:
- Miniature paints
- Primer
- Brushes
- A palette or wet palette
- Good lighting
An airbrush setup requires additional equipment, such as:
- Airbrush
- Compressor
- Air hose
- Airbrush cleaner
- Paint thinner or flow improver
- Cleaning equipment
- Suitable ventilation or a spray booth, depending on your setup
You do not necessarily need the most expensive equipment to learn how to airbrush miniatures. However, extremely cheap equipment can sometimes introduce unnecessary problems with clogging, inconsistent airflow, or poor control.
The best way to decide is to consider how much you are going to paint.
For a small skirmish force, a brush may be all you need.
For several armies, frequent vehicle projects, large monsters, terrain, or regular miniature painting, an airbrush can become a valuable time-saving tool.
Don't Forget Your Painting Space
Your workspace is just as important as the equipment itself.
A dedicated painting area with good ventilation and a protected work surface makes airbrushing much easier.
If you paint at a table that needs to be completely cleared after every session, a brush can be much more convenient.
The best miniature painting tool is ultimately the one you can use regularly.
A sophisticated setup that takes twenty minutes to prepare may be less useful than a brush that you can pick up immediately whenever you have half an hour to paint.
Why a Hybrid Miniature Painting Setup Often Works Best
For many painters, the best answer to airbrush or brush for miniatures is: use both.
Each tool can handle the tasks it is best suited for.
For example, you can use an airbrush to:
- Prime the miniature
- Establish directional lighting
- Apply the main basecoat
- Create broad shadows
- Add smooth highlights
Then switch to a brush for:
- Faces
- Eyes
- Metals
- Weapons
- Straps
- Pouches
- Emblems
- Edge highlights
- Small corrections
This hybrid workflow gives you the speed of an airbrush while preserving the precision of brush painting.
Example: Painting an Infantry Squad
For an infantry squad, you could start with a dark primer and then use an airbrush to apply a lighter color from above.
Next, spray the dominant armor or clothing color.
Once that is complete, switch to a brush for secondary colors such as weapons, straps, faces, pouches, and details.
Finally, use selective washes and highlights to bring the models together.
This approach can produce a consistent tabletop-ready army without turning every miniature into a multi-hour project.
Example: Painting Gaming Terrain
Terrain can benefit from the same combination of techniques.
Use an airbrush to establish the overall atmosphere: dust, rust, moisture, shadows, or ambient lighting.
Then use a drybrush to emphasize textures and edges.
Finally, add details such as vegetation, snow, artificial water, weathering effects, or pigments.
The result is terrain that reads clearly at gaming distance while still containing enough detail to look interesting up close.
Airbrush or Brush for Miniatures: Which Should Beginners Choose?
If you are just starting miniature painting, a brush is usually the easiest place to begin.
Choose a brush if you:
- Are learning how to apply thin layers.
- Only paint a few miniatures at a time.
- Want to paint a character or small army.
- Have limited workspace.
- Want to keep your initial costs low.
A small collection of good-quality brushes and well-chosen paints can take you a long way.
Consider adding an airbrush once you have established a basic painting routine and want to work on larger armies, vehicles, monsters, or terrain.
If you decide to buy one, practice first on inexpensive test pieces such as plastic spoons, primed cardboard, or spare miniatures.
Learn how paint consistency, air pressure, and spraying distance affect the result before using the airbrush on your favorite miniature.
So, Should You Buy an Airbrush or a Brush for Miniatures?
There is no universal winner.
A brush is better for precision, detail, corrections, and versatility. It is also the simplest and most accessible tool for beginners.
An airbrush is better for speed, smooth basecoats, large surfaces, gradients, and consistent army painting. It becomes increasingly valuable as the size of your projects grows.
For many miniature painters, the best setup is not airbrush vs brush, but airbrush and brush.
Use the airbrush to reduce repetitive work and establish smooth color transitions. Use the brush to add the details and definition that make the miniature come alive.
A display miniature demands precision and patience. An army demands consistency and repeatability. A gaming table demands coverage, texture, and atmosphere.
Choose the tool that removes the most repetitive work from your particular project—and let the other tool handle the jobs it is uniquely good at.






