
 Español

Why Miniature Paint Peels and Chips
- 07/04/2026 17:28:54
- Home , Assembly and Painting Guides
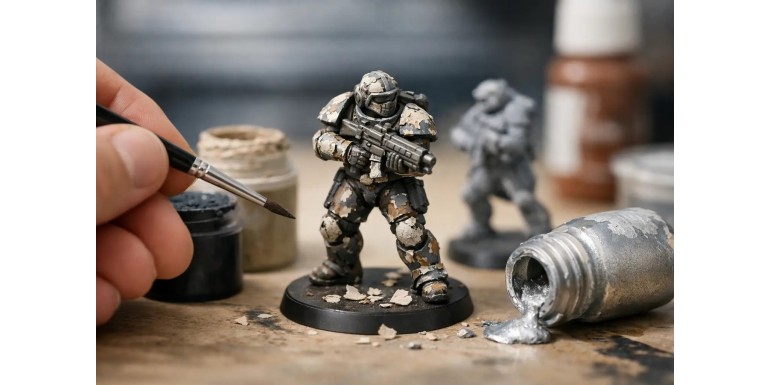
Few things are more frustrating in the hobby than finishing a miniature, letting it dry thoroughly, bringing it to the gaming table, and discovering a lifting edge, a chip on the helmet, or an entire layer flaking off a shoulder pad. If you are wondering why your paint is peeling, there is rarely just a single cause. Usually, two or three steps have failed at the same time: a poorly prepared surface, a weak primer, excessive handling, or a varnish that doesn’t match how the piece is actually used.
In miniatures and terrain, this is much more noticeable than in other paint jobs because we handle the pieces constantly. They are transported, they rub against foam, trays, dice, and scenery, and we work on highly diverse materials. Hard sprue plastic does not behave the same way as resin, white metal, 3D prints, or MDF terrain. Understanding this avoids a lot of unnecessary rework.
Why Paint Chips: The Most Common Causes
-
Lack of Grip: Acrylic paint needs a clean surface with a proper base to adhere to. If you paint directly onto smooth plastic, resin with leftover mold release, or unprimed metal, the layer might look stable at first, but it will lift as soon as there is pressure or friction.
-
Grease and Oils: Sometimes this comes from the manufacturing process—especially with resin—and sometimes we put it there with our own hands. Sweat, creams, or simply handling a mini too much before priming leaves an almost invisible film that ruins adhesion. On a display bust, you might not notice it immediately. On a unit going in and out of a foam case every week, you definitely will.
-
Poorly Built Paint Layers: A very thick layer doesn't grip better; it grips worse. When paint builds up, it dries on the outside before the inside, becoming rigid. Any subsequent impact creates a flake or a crack. This happens a lot when trying to quickly cover difficult colors like yellows, whites, or intense reds.
-
Inappropriate or Badly Applied Primer: If the primer turns out dusty, too thin, or doesn't cure properly, everything you put on top relies on a weak foundation. On the flip side, an excessive layer also fails because it creates a film that is too thick, which can peel off in chunks.
-
Real-World Handling: Spear tips, base rims, backpacks, wings, long weapons, and any sharp protrusions take a beating. Even if the paint is well-applied, if the piece is handled by these areas without varnish (or with a very weak one), wear and tear will arrive sooner.
The Material Matters More Than It Seems
Not all surfaces forgive the same mistakes. With injection-molded plastic, the problem is usually overconfidence—painting a piece just because it looks clean. In many cases, this is enough, but not always. If the miniature has passed through several hands during assembly, it’s best to wash it or at least wipe it down carefully before priming.
With resin, you have to be much stricter. Residual mold release agent is a classic enemy of paint. If not removed properly, the primer may grip unevenly, and the paint will peel precisely in the areas that look the smoothest. A wash with warm water and mild soap, using a gentle toothbrush, usually prevents a lot of headaches.
On metal, weight and sharp edges work against you. Even if the adhesion is correct, impacts are more severe. Here, good painting isn’t enough. You need to think about a solid primer, a tough varnish, and a transport method that doesn't batter the pieces. The metal holds up, but the paint doesn't always.
3D prints add another nuance. If the surface is not fully cured or if sanding dust remains, the paint sits on an unstable foundation. Additionally, certain layer lines and porous areas can cause a poorly applied primer to cover unevenly. It is not uncommon to mistake a finish issue for an adhesion issue.
Preparation Mistakes That Lead to Peeling Paint
When someone asks why their paint is chipping, the fault is often committed before the brush even touches the model. Preparation seems like the least glamorous step of the hobby, but it’s where you gain the most.
The basics work: clean mold lines, wash the model if the material requires it, let it dry completely, and avoid constantly touching the surface before priming. Using a painting handle or holder helps immensely, especially for gaming miniatures that will spend several sessions between coats.
It is also wise to check your glue. If residue remains on visible surfaces, or if you use adhesives that leave a shiny film, the primer might not sit well in that area. On partially assembled pieces, this later appears as a strange chip right on a joint.
And there is one detail many hobbyists overlook: time. Primer, paint, and varnish have a superficial drying time and a real curing time. Just because a miniature feels dry to the touch doesn't mean it is ready for intense handling. If you rush the process, especially in cold or humid conditions, the chances of peeling increase.
How to Prevent Miniature Paint From Peeling
The solution isn't complicated, but it does require consistency.
1. Prep the material according to its type: Clean plastic, washed resin, degreased metal, and fully cured, dust-free 3D prints.
2. Apply a dedicated miniature primer: Do this in thin, even coats. Your goal isn't coverage at all costs, but creating a micro-textured surface for the paint to grip.
3. Paint in controlled layers: If a paint covers poorly, it is much better to apply two or three thin coats than one thick one. For gaming miniatures, this not only improves the finish but also reduces the risk of paint plates snapping off edges and raised details.
Rethinking Varnish
Varnish deserves more attention than it usually gets. For display pieces, a delicate finish might suffice. For a tabletop army, modular terrain, or miniatures that travel often, it pays to use heavier protection. Sometimes it's even worth combining a tough gloss or satin varnish as a protective base layer, and then topping it off with a matte varnish to fix the visual finish.
Note: There is a small trade-off. Heavy protection can slightly alter the final look, especially on metallics, deep blacks, or skin effects. But for regular gaming, it is usually worth it.
Finally, how you handle the model matters. Holding it by the base, using painting handles, and allowing real curing time between stages drastically reduces early wear. It might not seem like a big deal until you compare two identical units after several months of gaming.
What to Do if the Paint Is Already Peeling
If the damage is minor, you don't always need to strip the whole miniature. First, check if the lifted edge is still poorly adhered. If there is loose paint, carefully remove it until you reach a stable area. Painting over a half-lifted flake only delays the problem.
Next, identify the cause. If the chip has reached the bare material underneath, the correct approach is to clean that area, spot-prime if necessary, and rebuild the colors in thin layers. If the problem occurs in multiple areas—especially on resin or metal—it might be more efficient to strip the paint entirely and start from scratch.
Something similar happens with terrain, but with one major difference: volume hides fixes much better. On ruins, floors, rocks, or industrial structures, a touch-up well-integrated with texture paint and pigments can become completely invisible. On a smooth shoulder pad or a character's cloak, not so much. There, it pays to be meticulous.
Gaming Miniatures vs. Display Miniatures
This is where the famous "it depends" comes in. A display-case miniature can afford more delicate finishes, less varnish, or decisions made solely for visual impact. A miniature meant to hit the table every week requires a different logic. It must withstand fingers, movement trays, carrying cases, and dice.
Because of this, many paint problems don't stem from bad painting, but from painting for a different use than intended. If your project is headed to the tabletop, prioritize grip, protection, and safe handling from day one. If it's going into a display case, you can accept certain fragilities in exchange for a finer finish.
In a specialized catalog like Terrain and Minis, this distinction matters a lot because not all paints, primers, and finishing products respond the same way on gaming figures, large terrain pieces, or exhibition models. Choosing wisely from the start saves time and avoids repaints.
The Most Useful Question to Ask
The right question is not just why the paint is peeling. The truly useful question is: where, when, and on what material is it peeling?
-
If it chips on edges and high-contact areas, it’s usually friction and insufficient protection.
-
If it lifts in wider sheets, it points to surface prep or primer failure.
-
If it only happens on resin, suspect the washing phase.
-
If it affects a freshly finished mini, re-evaluate layer thickness and curing times.
When you look at the problem this way, you stop treating every chip as bad luck. In most cases, it isn't. It is a clear hint as to which part of your process needs adjusting so that your next unit, vehicle, or terrain piece arrives at the gaming table in top condition. If a miniature is going to live through battles, transport, and campaigns, you don't need to paint it with fear—just with method. A little extra prep at the beginning almost always saves you from repairing edges and shoulder pads when you'd rather just be playing.
Do you need any adjustments to specific keywords, or would you like to add links to specific product categories (like primers or varnishes) within the text?






