
 Español

Key War Diorama Materials
- 07/03/2026 18:14:11
- Home , Assembly and Painting Guides
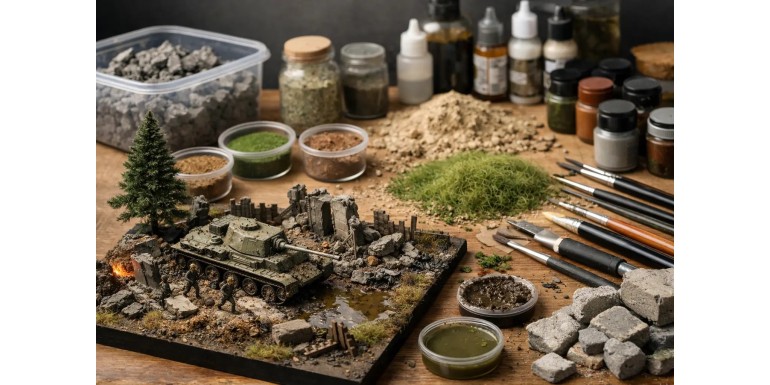
A great military diorama doesn't fail because of the tank's paint job or the infantry's pose. It usually fails much earlier, during the selection of your war diorama materials. If the terrain lacks scale, the texture is too coarse, or the environmental effects don't match the scene, the entire project suffers—no matter how beautifully painted the miniatures are.
The difference between a convincing build and one that looks rushed lies in using each material for what it actually does best. It’s not about buying more; it's about combining the base, volume, texture, vegetation, and effects with proper scene logic. A muddy front line, a bombed-out street, or a winter position all require entirely different approaches.
What War Diorama Materials Do You Actually Need?
The first group of materials is structural. This includes the plinth or base, rigid foam sheets, cork, thin wood, putty, and adhesives. These elements define heights, slopes, ruins, trenches, and craters. If this foundation is weak, the diorama can crack, warp, or break when moved.
-
The Base: It rules more than it seems. An MDF board or a rigid plinth provides stability and supports weight much better than cardboard or soft foam.
-
XPS Foam: Placed on top of the base, it allows you to easily carve slopes, ditches, or platforms without adding excess weight.
-
Cork: Perfect for broken rock, collapsed walls, and large rubble. However, keep an eye on its grain size so it doesn't look out of scale in 15mm or smaller.
Terrain Skin: Texture and Mud
Next comes the "skin" of the terrain. Texture pastes, fine sand, gravel, plaster, acrylic mud, and putties convert a basic shape into soil, rubble, or pavement.
Typical Mistake: Mixing materials that are too thick for the chosen scale. In 28mm you have more leeway; in 20mm and 15mm, a slightly large piece of gravel quickly looks like a massive boulder.
Base and Terrain Structure
If you want a solid scene, start with materials that are easy to control. Rigid foam allows you to build elevation quickly. Putty is excellent for blending transitions, cleaning up edges, and sculpting specific details like parapets, sandbags, or cratered earth.
+-----------------------------------------------------------------+
|                      STRUCTURAL MATERIALS                       |
+-------------------+---------------------------------------------+
| Material          | Best Used For                               |
+-------------------+---------------------------------------------+
| MDF / Rigid Wood  | Heavy resin vehicles, buildings, deep mud   |
| XPS Foam          | Quick elevation, trenches, hills            |
| Plaster / Resin   | Realistic walls and bricks (fragile)        |
| Compressed Card   | Interior elements, specific flat details    |
+-------------------+---------------------------------------------+
When building ruins, it's best to mix materials. Plaster looks great for walls and bricks but is fragile. Resin and plastic hold up much better to handling and transport.
Ground Textures, Mud, and Rubble
Among all war diorama materials, texture pastes offer the highest realism per dollar invested. A well-applied earth paste completely transforms an empty base. Furthermore, it integrates the miniatures into the terrain, which is key to making them look like they belong there rather than just being glued on top.
-
Fine Sands: Ideal for paths, dry terrain, fillers, and mixed surfaces.
-
Small Gravel: Works best in larger scales or for urban rubble.
-
Acrylic Mud: Provides color, volume, and a natural finish for wet scenes. It doesn't always replace your base texture, but it saves a lot of time.
In urban or industrial settings, rubble must have variety. Brick fragments, sand, fine dust, beams, planks, oil drums, wire, and wall debris work much better together than separately. If all the rubble is the same size, the result looks artificial. In war, visual chaos matters.
Vegetation and Environmental Elements
Not every war diorama needs lush vegetation, but almost all of them benefit from it. Static grass, tufts, dead leaves, shrubs, and moss help break up overly uniform surfaces. Even in devastated landscapes, you can find plant remnants, weeds growing on walls, or scorched grass.
The key is moderation and context:
-
Normandy or the Eastern Front: Vegetation can play a major role.
-
Stalingrad or Desert Positions: It must be used with strict restraint. The issue isn't adding plants; it's adding the wrong ones.
-
Autumn or Wet Scenes: Die-cut leaves and leaf-litter mixes fit perfectly.
-
Winter Settings: Vegetation looks best half-covered, muted, or broken.
Water, Snow, and Special Effects
This is where many dioramas either level up or get ruined. Water, snow, and moisture effects draw a lot of attention, so any mistake stands out immediately.
Artificial Water
Clear resins are great for puddles, ditches, rivers, and flooded areas, but they require a perfectly sealed base. If not, leaks, bubbles, or unwanted opaque spots will appear. For a believable military puddle, you rarely need deep water. Focus on the bottom color and the edges. A crystal-clear puddle looks decorative; one with mud, tracks, and oil stains fits a combat scene.
Realistic Snow
While there are ready-to-use pastes and homemade mixes, some yellow or lose texture over time. For display dioramas, it’s worth investing in dedicated modeling products to maintain the correct tone and grain scale. Remember: snow rarely falls uniformly. It should accumulate in corners, edges, roofs, vehicle tracks, and boots—not cover everything evenly like powdered sugar.
Smoke and Soot
These are best handled with pigments, an airbrush, and matte varnishes rather than large chunks of cotton. Cotton can work in specific cases, but it usually ages poorly. A subtly implied fire is always more convincing than an overacted cloud.
Paint, Pigments, and the Final Finish
Physical materials build the diorama, but paint brings the scene together. Primers, acrylics, washes, oils, and pigments create coherence between the miniatures, the terrain, and the scenery. If the ground uses a completely different color palette than the vehicle or the ruins, the eye notice it instantly.
-
Pigments: Crucial for replicating dust, dry mud, ash, and accumulated dirt. However, if you fix them too much, they lose their dusty texture; if you don't fix them enough, they rub off. Choose your fixer based on whether the diorama is for a display cabinet or frequent transport.
-
Oils and Enamels: They allow you to work on filters, streaks, and stains with plenty of blending time. They are incredibly useful for vehicles, damp walls, and fine weathering.
How to Choose Materials Based on the Scene
Don't buy random individual products. Buy with the specific terrain you want to represent in mind:
1. Urban Front: Fine rubble, broken brick, dust, twisted metal, and soot.
2. Rural Scene: Earth tones, vegetation, mud, and weathered wood.
3. Winter Environment: Believable snow, frozen ground, moisture, and cold, muted colors.
Scale is also a deciding factor. In 28mm, you can afford more visible texture and highly detailed accessories. In 15mm, everything must be scaled down. A grade of sand that looks correct in 28mm can ruin the ground proportions in 15mm. This is why it pays to buy hobby-specific materials rather than generic craft store supplies.
Finally, consider the end-use. If the diorama is for a display case, prioritize delicacy and fine detail. If it’s traveling to events or stores, opt for lightweight materials, solid bonds, and fewer exposed fragile parts. In a specialized store like Terrainandminis.com, this distinction is clear: buying for a competition piece is entirely different from building a themed gaming board that you will move multiple times a year.
Common Mistakes When Buying War Diorama Materials
-
Overcrowding: Mixing too many products without a clear scene concept.
-
Ignoring Scale: Choosing textures based on how they look in the jar rather than how they match the miniature scale.
-
Rushing Effects: Applying water, snow, or glossy mud too early before finishing the underlying base. Special effects are the finishing touch, not a cover-up for a weak foundation.
-
Focusing Only on Small Details: A spectacularly rusted oil drum won't save a flat, boring terrain layout. Composition, elevation, material transitions, and visual logic must come first.
If you are just starting out, it is much better to build a good basic assortment than to buy rare special effects. A solid base, fine texture, a bit of vegetation, versatile pigments, and a great adhesive will solve more projects than ten hyper-specific products. From there, each new scene will naturally tell you what else it needs.






