
 Español

Speedpaint Review for Miniatures: Tips, Results & Best Uses
- 07/26/2026 09:51:26
- Home , Assembly and Painting Guides
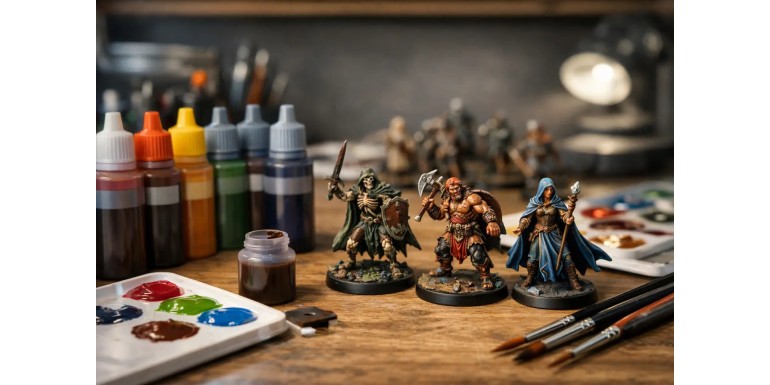
A unit of twenty miniatures can go from primed to table-ready in a single afternoon—but only if your paint behaves the way you expect. This Speedpaint review for miniatures breaks down what these translucent colors actually offer, where they save you time, and when it’s better to stick with traditional acrylic layering.
Speedpaint is designed for a very specific workflow: apply a single coat over a light basecoat and let the pigment pool in the recesses while the raised areas remain bright. The result delivers base color, shading, and an initial highlight in a single step. It’s not magic, nor does it replace every technique, but for armies, skirmish warbands, and board game projects, it offers undeniable value.
Speedpaint Review for Miniatures: Real-World Results
The main strength of Speedpaint is how quickly it makes a miniature readable on the tabletop. Cloaks, straps, monster hide, and wooden planks instantly gain depth without requiring separate basecoats, washes, and highlights. On highly textured figures—such as fantasy infantry, fur, organic creatures, or detailed armor—the effect can be excellent with a single, well-controlled application.
The tradeoff is that Speedpaint won't hide poor surface preparation. Over an uneven, clumpy, or overly dark primer, the paint loses its vibrancy and can look muddy.
It also forces you to plan your order of work: because it’s semi-transparent, every area retains part of the color underneath. An ivory, pure white, light gray, or zenithal basecoat will produce noticeably different results, even with the exact same bottle.
       [ Light / Zenithal Primer ]
                    │
                    ▼
          [ Single Speedpaint Coat ]
                    │
      ┌─────────────┴─────────────┐
      ▼                           ▼
[ Recesses ]                [ High Points ]
Deep Shading               Translucent Highlight
In the current range—especially with the Speedpaint 2.0 formulation—control has improved significantly over the original release. Reactivation when painting over previous layers has been drastically reduced, though it’s still wise to let each area dry completely before adding fine details, varnish, or extra layers. If you work with a wet brush and scrub the same spot repeatedly, any fluid paint can lift or leave tide marks.
Coverage and Finish
Not all Speedpaint colors cover the same way, and that isn't necessarily a flaw. Dark, highly saturated tones define recesses aggressively. Meanwhile, yellows, pale skin tones, bright reds, and vibrant colors often require a second coat or a warmer basecoat to achieve full intensity. It helps to view them as pigmented acrylic inks rather than thinned-down opaque paints.
| Color Profile | Recess Performance | Coverage Intensity | Ideal Application |
| Dark & Saturated Tones | High Contrast | Strong | Leather, dark cloth, armor recesses |
| Vibrant & Light Tones | Soft Contrast | Moderate (Needs 2 coats) | Bright cloth, skin, yellow/red armor |
The finish generally dries to a satin sheen. For a tabletop gaming miniature, this is often perfectly fine—sometimes even helpful for boosting contrast. However, a coat of matte varnish unifies the gloss levels across different materials. It also prepares the surface to accept crisp opaque highlights on edges, metals, eyes, teeth, or freehand emblems without distracting surface reflections.
The secret is loading your brush enough to cover the target area, but not so much that paint pools uncontrollably. Once applied, guide the excess toward the deepest shadows before it begins to set. On large, flat surfaces—like smooth capes, armor plates, or vehicle panels—pooling can cause visible ring marks. On those surfaces, Speedpaint demands much more brush control than standard acrylics.
Which Projects Work Best with Speedpaint?
Speedpaint delivers the highest return on investment when your priority is batch-painting many miniatures with consistent quality.
-
Core set troops
-
Swarm faction units
-
RPG warbands
With a zenithal primer, three or four main colors, a few metallics, and a clean base, you can achieve miniatures that look fantastic at arm's length.
[ Zenithal Primer ] ➔ [ 3-4 Main Speedpaints ] ➔ [ Opaque Metallics ] ➔ [ Finished Base ]
It also serves as a powerful step inside a more advanced painting process. You don't have to limit yourself to the "one-coat" promise. Applying Speedpaint to skin or cloth, then coming back with opaque acrylics for edge highlights, preserves rich shadows while restoring maximum brightness to top surfaces. For character models, this hybrid method saves substantial time during the blocking-in phase without sacrificing a custom finish.
For scenery, it has practical uses on stone, wood, leather, dirt, brick, and foliage. On heavily textured terrain, the paint automatically finds the shadows that you would otherwise need to build up with washes. However, it is not the ideal choice for flat walls, large building facades, or smooth water effects, where traditional acrylic layers, controlled glazes, or specialized weathering products excel.
When Speedpaint Isn't the Right Choice
If your goal is flat color fields, crisp heraldry, or perfectly uniform armor plating, opaque acrylic paints remain the superior option. Speedpaint can serve as an initial shading filter, but it won't give you a completely flat red on a shield or a pristine white on a knight's cape by itself. Transparency is an inherent part of its nature.
It is also not the most forgiving tool for absolute beginners who like to fix mistakes as they go. An opaque base paint covers errors easily. With Speedpaint, fixing a spill usually requires re-priming or repainting the area with a light base color before reapplying the shade. This doesn't mean beginners shouldn't use it, but it requires a strategic mindset: work area by area, don't re-touch drying paint, and accept that the first pass might need minor touch-ups.
Large, featureless miniatures require testing. A tank, a mech, or a creature with wide, smooth wings will show drying lines if you try to cover an entire panel at once. For those models, break the surface down into natural panel sections, use a dedicated medium to extend working time, or save Speedpaints for tinting and shading over an opaque base.
Preparation, Brushes, and Dilution
Your choice of primer impacts the final result more than the number of paint colors you use.
-
Pure White: Yields maximum brightness, though vibrant tones can appear very intense.
-
Light Gray: Softens the overall contrast for a more realistic palette.
-
Zenithal Priming (Dark undercoat + Light topcoat): Adds natural depth and shade before a single drop of paint hits the model. For grimdark fantasy or military sci-fi, a gray base with an ivory zenithal highlight offers an ideal foundation.
Use a brush with a sharp point and a generous belly. Small detail brushes don't hold enough liquid, forcing you to reload constantly and risking uneven drying. Keep the brush moist—not soaking wet—and wick off excess paint on a palette before touching the miniature. A wet palette works, but a smooth plastic or tile palette makes it much easier to judge the paint's true flow.
[ Correct Technique ]
Moist Brush + Generous Belly ➔ Flow Control ➔ Smooth Gradients

[ Incorrect Technique ]
Soaking Wet Brush + Tiny Tip ➔ Excess Pooling ➔ Tide Marks & Rings
Diluting Speedpaints with water can cause pigments to separate and break the surface tension that makes them pool correctly in recesses. Using a dedicated Speedpaint Medium is much safer. Medium lets you create softer tones, subtle glazes over metallics, or smooth skin transitions without breaking the paint's chemistry. Always test your mix ratios on a spare piece of plastic or under a base first.
How to Integrate Speedpaints Into Your Workflow
A reliable, table-ready recipe starts with a light primer and Speedpaints on the main organic sections: skin, cloth, leather, wood, and fur. Next, paint metal details with opaque metallics, tidy up any overspill with standard base paints, and pop quick edge highlights on the highest points. Completing the base with texture paste, grass tufts, or gravel instantly elevates a simple paint job into a polished miniature.
For display miniatures or centerpiece heroes, treat Speedpaints as a transparency tool. Use them to establish deep shadows quickly, tint base colors, or add color variation to natural textures. Then, build up volume using thin layers of opaque paint. This hybrid approach often produces richer results than trying to paint the entire figure with a single paint system.
You don't need to buy a massive paint set right away. Start with a focused selection tailored to your immediate project:
-
A versatile brown for leather and wood
-
A solid skin tone
-
Two or three primary outfit colors
-
A green for foliage or monsters
-
A dark gray or black for shadows and gear
Once you see how these shades react with your preferred primer, expanding your collection becomes much easier.
Speedpaint earns its spot on the painting desk if you want high-contrast, characterful miniatures without turning every squad into a month-long project. Test it on a rank-and-file trooper, prepare your surfaces well, and let it speed up your process. Fast-painting tools work best when they serve your project—not when they force your project to adapt to them.






