
 Español

What Paint to Use for Scenery and Terrain
- 06/27/2026 17:34:22
- Home , Assembly and Painting Guides
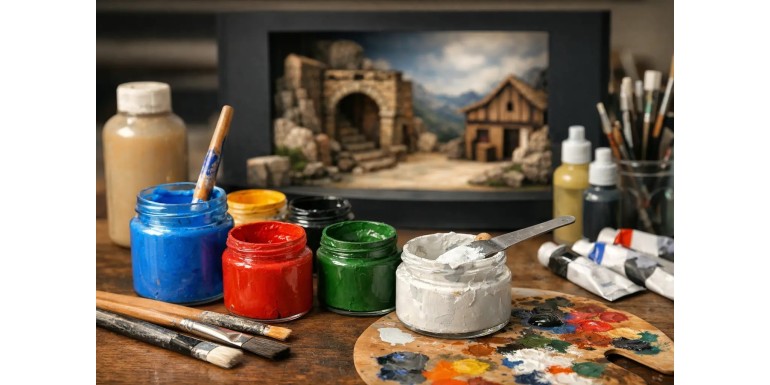
When you ask yourself what paint to use for scenery and terrain, color is rarely the primary issue. Instead, it comes down to the material, the finish, and the amount of wear and tear that specific piece will endure on the tabletop. A piece of wargaming ruins made from XPS foam requires a completely different approach than an MDF building, a 3D-printed rock, or a highly detailed resin diorama piece. Choosing correctly from the start saves you unnecessary extra layers, unwanted textures, and paint chipping off by your third gaming session.
Choosing Scenery Paint Based on the Material
The short answer is straightforward: for most terrain projects, water-based acrylic paint is the safest, most versatile, and easiest choice to work with. It offers excellent coverage, dries quickly, cleans up effortlessly, and fits into almost any hobby workflow. However, that "almost" matters immensely.
When painting terrain, you are not just painting a visible surface. You are also dealing with volume, texture, porosity, and durability. A plaster wall, a sheet of foamboard, a laser-cut HDF structure, and a resin house will all react differently, even if you apply paint from the exact same bottle.
XPS Foam, Polystyrene, and Foamboard
There is one rule you should always remember: avoid solvent-based spray paints directly on raw foam. Many aerosol primers and synthetic paints will melt or severely pit the material. In these cases, the most reliable approach is applying an acrylic primer using a brush or an airbrush, or applying a protective barrier beforehand using diluted PVA glue, Mod Podge, or a similar sealing mixture.
Once the surface is completely sealed, matte acrylic paint performs beautifully. For large surfaces, earth tones, grays, ochres, and muted greens usually yield the best results when applied with a large brush or through heavy drybrushing. There is no need to waste expensive miniature paint to cover an entire rocky cliffside. For large-scale terrain, craft or decorative acrylics are an excellent, cost-effective option as long as they have a decent pigment load.
MDF, HDF, and Wood
Wood is highly absorbent, particularly along cut edges. If you paint directly onto it, the material will soak up your product, resulting in an uneven finish and wasted paint. It pays off to seal it beforehand with a dedicated primer or a thin layer of diluted PVA glue. Once sealed, a matte acrylic will cover it without any issues.
For MDF pieces destined for the gaming table, durability is far more critical than extreme color saturation. Matte finishes are superior at concealing wear, scratches, and accumulated terrain dust. Furthermore, if you plan to apply washes, rust effects, or pigments, an overly satin base will make controlling those elements much harder.
Resin and Plastic
Resin and plastic bond exceptionally well with hobby-specific modeling primers. Here, you can safely use spray cans, provided the material allows it and you use compatible products. The key is never to skip the priming stage, as paint struggles to adhere to smooth, non-porous surfaces.
Following the primer, acrylic paint is once again your primary tool. If you are aiming for industrial finishes, weathered metallics, or sci-fi walls, you can effectively combine an acrylic base layer with washes and drybrushing. This type of scenery is where thorough surface preparation yields the most visible rewards.
Plaster, Gypsum, and Modeling Clays
These materials absorb paint aggressively. If you fail to seal them, the first layer will vanish completely, causing the color to lose all its vibrancy. A primer or a sealing mix is vital to control this absorption. Once applied, you can work normally with standard acrylics, inks, or homemade washes.
For stone, ruins, and walls, matte acrylic stands out because it catches onto physical relief perfectly and responds beautifully to drybrushing. For fantasy or historical terrain, few techniques are as rewarding as a dark basecoat followed by successive, progressive drybrushes.
Acrylic, Spray, Enamels, or Oil Paint?
When comparing different types of paint for scenery, it is best to separate your primary choices from your secondary tools. Acrylic paint serves as the backbone of your project. Spray paint is ideal for priming or speeding up basecoats. Enamels and oils are best kept as specialized weathering tools rather than all-purpose paints.
Water-based acrylic is highly recommended for almost any tabletop hobbyist. It is straightforward, mixes well, dries fast, and allows you to fix mistakes easily without needing a lab-grade setup. It is incredibly practical for modular or frequently handled terrain.
Spray paint is incredibly useful when you need to cover a vast surface area quickly—especially on buildings, ruins, barricades, or repetitive structures. The downside is that not all sprays work on all materials (as noted with foam). Additionally, using them on cold or humid days can ruin your surfaces with an unintended grainy texture or irregular drying patterns.
Enamels and oil paints truly shine when adding weathered effects, grime, streaks, filters, or complex panel lining. They yield stunning results but require more technical control, extended drying times, and specific cleaning solvents. While not strictly necessary for standard gaming terrain, they elevate display pieces and dioramas significantly.
Which Finish is Best for Scenery?
For the vast majority of gaming tables, a matte finish is the superior choice. Scenery with an accidental gloss or satin sheen often looks like a cheap toy, particularly on stone, dirt, concrete, or weathered wood. A matte finish helps unify disparate materials and makes the terrain look far more realistic under standard room or natural lighting.
A satin finish can make sense for painted metal, machinery, wet surfaces, or specific sci-fi elements. True gloss should be reserved exclusively for targeted effects like wet mud, standing water, toxic sludge, or glass lenses. If everything shines, nothing stands out.
It is also vital to view your final varnish as part of your painting system. Scenery meant to be played with week after week requires robust protection. A matte acrylic varnish offers the most balanced solution; it provides ample protection without dulling your hard work. For pieces that take heavy abuse, you can apply a tough satin or gloss protective varnish layer first, and then finish with a matte coat to restore the natural look.
Miniature Paint vs. Budget Paint
There is no single correct answer here. It depends entirely on the size of the piece and the level of detail you want to achieve. For large terrain features, relying exclusively on premium miniature paint ranges can get expensive very quickly without offering a proportional improvement in quality. For base blocks, wide walls, floors, and rocks, large-format craft acrylics work perfectly.
Where finer hobby paints are genuinely worth the investment is in the details: controlled transitions, army-specific colors, or precise special effects. Examples include control panel lights, signs, finely worked rust, selective moss, or freehanded iconography. Mixing and matching intelligently almost always yields a better result than marrying yourself to a single product range.
In a specialized catalog like Terrainandminis, it makes perfect sense to mix products based on their exact function: using the correct primer for the material, a cost-effective base paint for bulk volume, and specialized modeling paints where a refined, high-pigment finish matters most. It is a realistic, professional way to build terrain without blowing your budget.
Common Mistakes When Choosing Paint for Scenery
-
Treating scenery like a giant miniature: It does not always require micro-thin layers or extreme precision. It needs solid coverage, great surface adhesion, and durability. Prioritizing a fine finish over durability means you will constantly be touching up chipped pieces.
-
Neglecting to seal porous surfaces: This is highly noticeable on plaster, wood, and textured foam. You will waste paint, lose color intensity, and end up with an irregular finish.
-
Using pure black for everything: When painting ruins and terrain, a dark brown or charcoal gray provides a much more natural, forgiving base coat for subsequent highlights.
-
Falling for false economy: Buying the cheapest possible paint without considering opacity, texture, or adhesion can ruin a project. Some cheap paints have abysmal coverage, leave lumps, or reactivate when you try to paint over them. Aim for an optimal balance of price, yield, and behavior on hobby materials.
A Reliable, Proven Workflow
If you are looking for a practical framework, here is a highly reliable workflow for most tabletop terrain: First, seal or prime based on the material constraints. Next, apply a dark acrylic basecoat. From there, build up your volume using heavy drybrushing or broad layering. Add washes where you need deep shadows, paint your fine details, and protect everything with a high-quality matte varnish.
While not the only method, this works exceptionally well for ruins, rocks, weathered wood, sandbags, rubble, and military fortifications. If your project features advanced elements like mud, snow, static grass, or artificial water, those effects will look significantly better when applied over a cohesive, well-resolved painted base.
The best paint for scenery is neither the most expensive nor the most technical option available. It is the one that perfectly aligns with your material, how the piece will be handled, and the time you wish to invest. Choosing with this logic turns terrain painting from a chore into an incredibly rewarding part of the hobby—and that is something players will notice from the very first roll of the dice.






