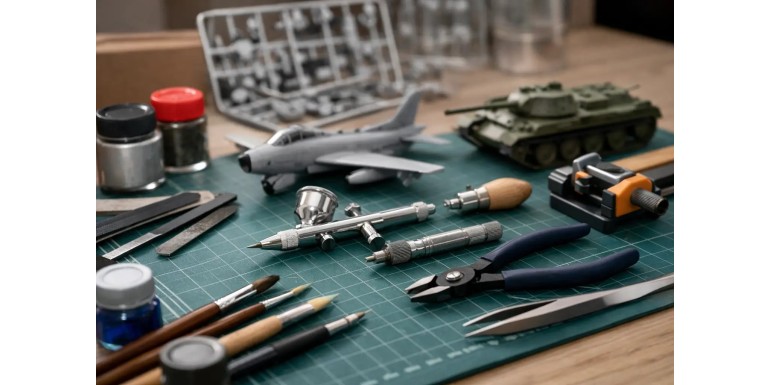
There is a very clear difference between enjoying your hobby and fighting against it: using the best modeling tools based on the specific task in front of you. You don’t need to clutter your workbench with accessories or buy the most expensive gear from day one, but it is highly beneficial to invest wisely in a few key pieces that truly elevate your cutting, assembly, finishing, and painting processes
In scale modeling—and even more so if you work on miniatures, terrain, or wargaming bases—a poor tool doesn’t just slow you down. It also breaks components, leaves mold lines and flashes that are difficult to correct, and forces you to repeat steps. That is why it pays off to think of your equipment as an integral part of the final result, rather than a secondary expense.
What Makes a Tool Truly Useful
The best tool is not always the most expensive one, but rather the one that performs reliably for a specific task. A pair of sprue cutters that work flawlessly on plastic can struggle with resin. An excellent brush for basecoating is not necessarily the right one for edge highlighting or freehand work. Similarly, an aggressive file might be perfect for terrain making but will instantly ruin fine details on a 28mm miniature
Your workflow also plays a major role. If you are assembling full armies, you need speed and consistency. If you create dioramas or display-quality showcase pieces, you will likely value precise control and the ability to correct minor flaws. Therefore, when discussing the best modeling tools, it is best to categorize them by function rather than simple popularity.
The Best Modeling Tools by Workflow Stage
1. Precision Side Cutters / Nipper Plier
This is the most frequently used tool when starting a kit and, ironically, often the one chosen most poorly. A good precision cutter must fit easily between sprue gates, cut cleanly, and not strain your hand after several hours of use. With plastic, you notice immediately when the blade alignment is sharp: instead of snapping the material off, it cleanly slices through it.
The important nuance here is not to ask of it what it wasn't designed for. Even a high-quality nipper can be damaged if used on metal rods, thick resin, or components that are too hard. For plastic miniatures, it is practically indispensable. For other materials, it is best combined with a hobby saw or a heavy-duty blade.
2. Hobby Knife or Modeling Scalpel
If you had to choose just one versatile tool, this would be it. It is used to clean mold lines, score joints, shave off minor excess material, and handle straightforward conversions. Control matters much more than force, which is why a comfortable, ergonomic handle is usually a better investment than a supposedly miraculous blade.
You must also accept the trade-off: a highly sharpened blade cuts beautifully but demands more concentration. When it starts dragging instead of slicing, it isn't "still fine"—it is asking for a replacement. On small miniatures, pushing forward with a dull blade usually leads to more mistakes rather than savings.
3. Files and Abrasive Sponges
After cutting comes the finishing stage, and this is where many hobbyists fall short. Metal files work well on metal and certain hard surfaces, but for plastic and resin, fine-grit sandpaper or flexible sanding sponges are generally better because they allow you to smooth out surfaces without erasing crisp detail.
Ideally, you should have more than one grit size: a medium grit for correcting imperfections and a fine grit for finishing touches. While this is less critical for large terrain pieces, every single blemish on a character miniature will stand out under primer. A surface that looks clean to the naked eye can reveal defects as soon as lighting or paint is applied.
4. Appropriate Glue for Each Material
It isn't always thought of as a tool, but in practice, it is—and a highly decisive one at that. Plastic cement welds components together and offers clean, permanent bonds when surfaces fit snugly. Cyanoacrylate (super glue), on the other hand, is the standard choice for resin, metal, or mixed-material assemblies.
The most common mistake is not using too little, but using too much. Excess adhesive leaves messy residue, fills in fine details, and complicates assembly. If you are working on large terrain pieces, a thicker, high-viscosity adhesive might suit you best. If you are assembling infantry or delicate components, you will appreciate fine-tip applicators and controlled drying times.
5. Pin Vice / Manual Hand Drill
Those who haven't tried it usually leave it for later; those who use it regularly can no longer live without it. A hand drill is used to pin joints, reinforce fragile parts, drill out gun barrels, insert anchoring wires, and prepare conversions with greater structural safety.
On heavy miniatures or models with tiny contact points, it is a tool that prevents countless future breakages. It might not be the flashiest gadget on the desk, but it is one of the ones that most improves the durability of your project. In terrain building, it also makes perfect sense for secure structural joints and framing.
6. Modeling Putty for Filling and Sculpting
Not every hobbyist sculpts, but almost everyone needs to fill gaps. Visible seam lines, assembly gaps, awkward transitions between parts, or minor casting defects show up sooner or later. That is where modeling putty comes in, whether it is a two-part epoxy or a formulation designed for quick gap filling.
The key is choosing the right type for the job. A flexible, workable putty is great for conversions and custom textures. A specialized gap filler might be better if you simply want to smooth out joints. If you build terrain, you will also want a putty that handles sanding well and accommodates volume without shrinking excessively.
7. Paintbrushes That Withstand Real Work
You don't need twenty brushes. You do need them to cover distinct roles. A brush for basecoating, another for fine detail, and a few more durable ones for washes, drybrushing, or applying textures provide a very sensible foundation. For gaming miniatures, reliability carries more weight than the romanticism of the "perfect brush."
The point here is purely practical: not every task deserves the same brush. Using a premium brush for glues, aggressive varnishes, or heavy pigments is a quick way to ruin it. In contrast, reserving your best brushes exclusively for fine detail work extends their lifespan and enhances control where it truly matters.
8. Wet Palette
It isn't mandatory, but it helps far more than it seems, especially if you paint with acrylics and run long sessions. It keeps paint workable for longer periods, facilitates stable color mixing, and reduces waste. For anyone painting entire units or smooth color transitions, the benefit is noticeable from the very first use.
That said, it shouldn't be over-idealized either. Not all paints react the same way, and there are techniques—like certain drybrushing methods or heavy, textured effects—where a standard dry surface remains more comfortable. It is an incredibly useful tool, not a universal fix-all.
9. Airbrush (If Your Workload Justifies It)
It is best to be clear here: not everyone needs one. However, if you prime a lot of models, paint vehicles, large monsters, terrain, or entire armies, an airbrush saves massive amounts of time and delivers incredibly smooth finishes on basecoats, zenithal highlights, and wide transitions.
The trade-off is obvious. It requires ongoing maintenance, thorough cleaning, and a bit of a learning curve. For an occasional painter of individual models, it can feel like more hassle than help. For a regular wargaming or terrain hobbyist, however, it usually ends up becoming a central, indispensable tool.
10. Texturing and Finishing Materials
In tabletop modeling, the process doesn't end once the miniature is assembled. Bases, terrain, and dioramas need finishing products to provide context: texture pastes, sands, static grass, snow, mud, artificial water, or pigments. These are not secondary accessories; often, they are exactly what elevates a piece from merely acceptable to entirely convincing.
Furthermore, they allow you to adapt your project to a specific ruleset, setting, or army theme. A desert, industrial, snowy, or urban environment completely changes the visual narrative of the collection. This is where a specialized storefront like Terrainandminis.com makes complete sense for the hobbyist who wants to avoid jumping between generic categories and products irrelevant to the gaming table.
How to Build a Tool Kit Without Buying Twice
If you are just starting out, the most sensible approach is to build a solid foundation: nippers, a hobby knife, basic sanding tools, the right glue, and a couple of good paintbrushes. With just that, you can assemble and paint much more than it seems. A hand drill, modeling putty, or a wet palette are usually the next logical steps forward.
If you have been in the hobby for a while, your upgrade path likely isn't about adding more items, but rather replacing the ones that have worn out. A dull nipper that crushes plastic, a blade lacking precision, or a paintbrush that no longer holds its point create small errors that compound over time. Upgrading those core pieces usually feels far more rewarding than buying an exotic tool you will rarely use.
For terrain and dioramas, the balance shifts. Large-scale cutting tools, high-strength adhesives, heavy texturing materials, and solutions for large surface areas gain greater importance. For display-level miniatures, however, fine detail, clean joints, and precise paint control matter significantly more.
Common Mistakes When Searching for the Best Modeling Tools
One of the most common mistakes is trying to make a single tool serve every purpose. The second is impulse-buying massive kits filled with mediocre tools that end up forgotten in a drawer. And the third, highly typical mistake, is investing heavily in paint and miniatures before securing a decent assembly foundation.
It is also wise to avoid the idea that the final result depends solely on technique. Technique matters, of course, but the appropriate tool reduces your margin of error and makes your process repeatable. This is particularly valuable when painting entire factions or building multiple terrain pieces with real gaming deadlines in mind.
Choosing well isn't about having a spectacular, photogenic workbench; it's about working with less friction and more control. If every tool you add solves a specific need for your miniatures, bases, or terrain, the hobby becomes more fluid, and the results will show clearly when your pieces finally hit the tabletop.

 Español