
 Español

Why and When to Varnish Painted Miniatures: The Ultimate Guide
- 07/22/2026 09:26:24
- Home , Assembly and Painting Guides
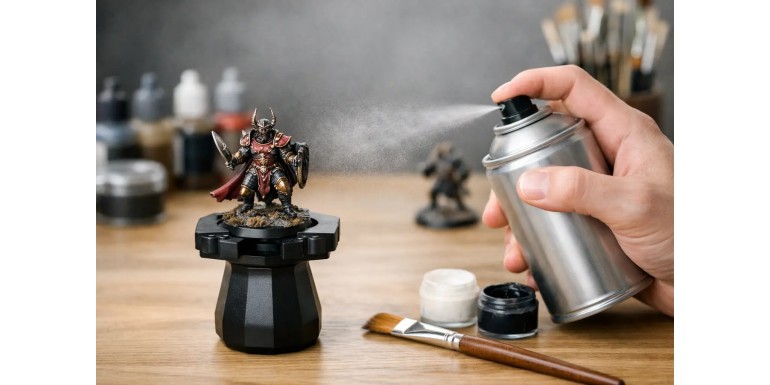
A sword scraping against other models in a transport box, a base edge constantly grabbed during a game, or a shoulder pad handled to measure distances—all of these can wear down hours of hard work long before you expect. That is the practical reason for varnishing painted miniatures: creating a protective sacrificial layer to absorb friction, skin oils, and minor bumps before they ever reach your paint job.
Varnish isn't mandatory for every single project, nor will it turn a fragile figure into an indestructible object. However, for tabletop gaming pieces, high-metal models, or display miniatures you want to preserve for years, it is easily one of the most cost-effective decisions in the painting process. The key lies in choosing the right finish and applying it with the same care you give to highlights and final details.
Why You Should Varnish Painted Miniatures
Acrylic paint adheres well to a properly primed surface, but once dry, it remains vulnerable to continuous handling. Constant friction can polish edges, rub paint off sharp details, and leave shiny spots caused by natural skin oils. This wear is especially noticeable on weapons, shields, backpacks, helmets, and the edges of bases used to move figures around the board.
Applying a protective varnish adds a clear shield over your paintwork. If a miniature takes a light knock or rubs against another model in a carry case, that transparent coat absorbs the brunt of the wear. Over time, the varnish itself may degrade, but replacing or suffering minor wear on a clear coat is far better than losing a smooth color blend, a complex freehand insignia, or a weathered rust effect that took hours to achieve.
Unifying Finishes and Easy Cleaning
Varnish also helps unify the overall appearance of your model. After working with washes, contrast paints, inks, pigments, and various paint brands, it is common for some areas to look ultra-matte while others remain satin or glossy. A well-chosen final coat reduces these harsh contrast shifts, giving your miniature a cohesive look from a gaming distance.
There is a third, less obvious benefit: it makes cleaning safe. Dust and surface dirt can be brushed off a varnished miniature much more securely using a soft, dry brush. For terrain and dioramas left on display for months, this protection is equally valuable—though delicate special effects should always be tested before coating.
Varnish Protects, But It Doesn't Fix Base Mistakes
Varnishing is not a substitute for proper priming. If your paint flakes off when gently scratched due to poor adhesion, varnish will only delay the inevitable peel. The same applies to surface contaminants like mold release agents, sanding dust, oily fingerprints, or excessively thick paint layers. The surface must be clean, and the primer fully cured, before painting even begins.
It is also not a magic cure for heavy metal miniatures or highly flexible resin. These materials can bend or suffer impacts that exceed the physical limits of any clear coat. Always transport your figures in foam inserts, magnetic trays, or dedicated cases to prevent models from clashing together. Varnish is one part of a complete protection system, not a replacement for proper storage.
Gaming Tip: Tabletop miniatures require special focus on high-touch areas. A unit fielded every weekend needs far more protection than a display piece in a sealed glass cabinet. For this reason, many hobbyists apply a durable protective layer first, then adjust the final visual sheen with a coat of matte or satin varnish.
Matte, Satin, or Gloss: Which Varnish Finish Should You Choose?
Your choice of finish alters both the perceived protection and how the paintwork reads on the tabletop. There is no single "universal" varnish for every army, scene, or material.
| Varnish Finish | Best Used For | Key Features & Considerations |
| Matte Varnish | Fantasy, historicals, cloth, leather, skin, stone | Eliminates glare; enhances natural light/shadow readability. Can dull metals and gems if overapplied. |
| Satin Varnish | Armor, vehicles, synthetic uniforms, wet scales | Provides a soft, realistic sheen. Blends texture variations nicely without acting like a mirror. |
| Gloss Varnish | Glass, lenses, fresh blood, slime, water, polished metal | Extremely high shine. Hides highlights if used overall, but offers a durable base layer. |
A popular technique involves applying a tough gloss or satin coat first for maximum durability, followed by a matte coat to kill unwanted shine. While effective, keep in mind that some modern matte varnishes offer excellent protection on their own. Adding unnecessary layers can obscure fine details or alter subtle paint tones.
When to Use Selective (Selective/Brush-On) Varnishing
You don’t have to coat the entire miniature in the exact same finish. Applying a spot-gloss varnish to a power sword, creature eyes, or a muddy puddle on the base introduces striking material contrast. A touches-only satin coat can bring armor to life without turning a cloth cape glossy.
Selective varnishing should be done at the very end, after your main overall finish is complete. Using a small detail brush gives you total control, keeping gloss off fabrics and skin. It is one of the easiest ways to differentiate textures without repainting transitions.
When to Varnish Miniatures and How Long to Wait
Your miniature must be completely dry and cured before applying any varnish. Acrylic paint may feel dry to the touch within minutes, but curing takes longer. Thin glazes dry quickly, whereas heavy paint applications, deep washes, or highly pigmented inks require extra drying time.
-
Standard Paints: Wait a few hours before varnishing.
-
Washes, Oils, Enamels & Texture Paste: Wait at least 12–24 hours. Varnishing too early can reactivate lower paint layers, drag pigments, trap moisture, or ruin the finish. When working on an important project, waiting until the next day is best practice.
Handling Dry Pigments
Loose weathering pigments require extra caution. Direct varnishing can darken them, alter color saturation, or eliminate their dusty texture entirely. If you are going for dry mud or ash effects, test your process on a spare base first. It is often best to fix pigments with a dedicated pigment fixer and varnish only the painted areas beneath them.
How to Apply Varnish Without Ruining Your Paint Job
Application technique is just as crucial as the varnish product you select. Always shake the bottle well and test it on a spare piece of plastic, an unused base, or a test miniature first. Temperature, high humidity, and poor airflow can drastically change how varnish cures.
1. Brush-On Application
Apply thin, even coats without repeatedly brushing over areas that have already started to dry. Brushing offers precision for single models and selective finishes, but thick varnish can pool in recesses. Dilute only if recommended by the manufacturer; over-thinning can weaken the protective strength.
2. Airbrush Application
An airbrush provides an exceptionally controlled layer and is the premier choice for painting armies or large vehicles. It allows you to build up multiple light passes that reach tight crevices without flooding fine details. Ensure your airbrush is thoroughly cleaned after use and properly mixed to avoid speckling.
3. Spray Can (Rattle Can) Application
Spray varnish is fast and convenient, but requires environmental discipline.
-
Spray at the manufacturer’s recommended distance using short, sweeping passes.
-
Never start or stop the spray stream directly on the model.
-
Avoid high humidity or cold temperatures, as these conditions cause frosting (a white, hazy film). Always work in a dry, well-ventilated space within the ideal temperature range.
Fixing Frosting: If your model turns cloudy/white after spraying, do not rub it or immediately add a thick coat. Let it dry completely, then try applying a very thin layer of gloss or satin varnish over a discrete area—this often restores transparency. Prevention, however, is always better than cure!
Cases Where You Might NOT Need to Varnish
If you paint purely for display cases and handle your models strictly by the base, you can skip varnishing to preserve the raw, unadulterated texture of your paints. Ultra-matte finishes, delicate pastel effects, and certain raw pigment techniques can lose their subtle charm under a clear coat.
Additionally, hold off on varnishing if you plan to make future touch-ups or adjustments. Painting over varnish is possible, but new paint may flow differently, requiring you to re-varnish the entire area to match the finish later. If the project is still open, wait!
For tabletop gaming pieces, varnish is an essential tool in your hobby kit—just like a good primer or a sturdy transport case. Test your chosen finish, respect cure times, and send your armies into battle without fearing every light scratch!






