Español

How to use washes on miniatures: a step-by-step guide
- 07/24/2026 09:17:38
- Home , Assembly and Painting Guides
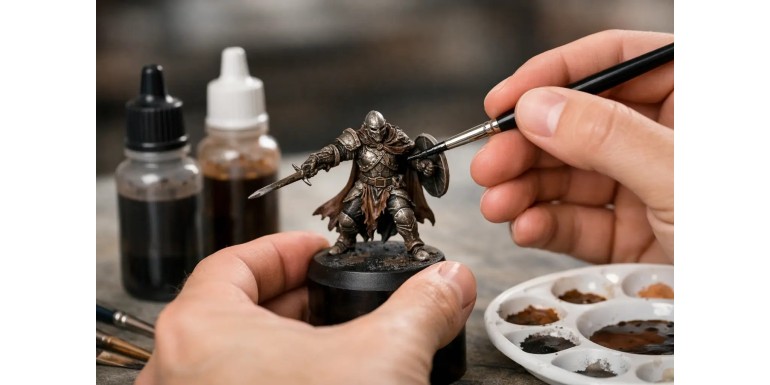
Silver armor can look flat even with a clean base coat; a face can lose all its expression; a ruined wall can look like raw sprues straight out of the box. Knowing how to use washes on miniatures fixes most of these issues with a simple, fast, and exceptionally useful technique for both gaming armies and display pieces.
A wash does not replace well-applied base coats, nor does it fix a chalky or dusty primer. Its sole purpose is to flow into recesses, deepen shadows, and introduce color variation. Used correctly, it makes volume and depth easily readable at a tabletop distance. Used poorly, it leaves shiny tide marks, pooling, and overly dark spots. The secret lies in controlling paint volume and deciding where it should flow.
What a Wash Does and When to Apply It
A wash (or shade) is a very fluid paint packed with enough pigment and medium to flow across surfaces and settle into cracks. As it dries, it darkens armor joints, cloth folds, eyes, rivets, stone cracks, and base textures. It can also tint an area to blend it together: a warm brown over bone creates richness, a muted green adds dampness, and a bluish-black cools down metal surfaces.
Ideal Sequence for Application
The most common workflow comes right after applying your base coats:
1. Paint each area with its core base color.
2. Apply the wash and allow it to dry completely.
3. Tidy up and highlight the raised areas using a lighter shade or a drybrush, depending on the material.
This sequence is extremely efficient when batch-painting entire units.
Important Note: Avoid bathing the entire miniature indiscriminately. On figures with large, flat surfaces—such as wide shoulder pads, smooth cloaks, or vehicles—an all-over wash can dry unevenly. In those cases, perform a recess wash (panel lining) targeted only at joints and deep shadows. A wash is a precision tool, not an automatic shortcut.
How to Apply Washes Without Staining Your Miniature
Start with a properly primed miniature and fully dry base coats. Working over damp paint risks reactivating lower layers, causing ugly tears or bare spots.
Essential Preparation
-
Two Brushes: Use one brush to apply the wash and a clean, slightly damp brush to wick away excess liquid.
-
Brush Choice: A medium pointed brush with a healthy belly often works better than a tiny detail brush because it holds enough liquid without requiring a reload every two seconds.
Step-by-Step Application Technique
1. Load and Unload: Load your brush, then lightly dab it on a palette or paper towel. You are not drybrushing, but you must prevent an uncontrolled drop from spilling off the tip.
2. Apply with Capillarity: Touch the brush to the target area and let capillary action draw the wash into the grooves.
On chainmail, you can coat the entire surface.
On a face, target eye sockets, beneath the nose, the jawline, and the hairline.
3. Control the Pooling: Watch the miniature carefully during the first few seconds. If wash pools on a flat surface, touch the edge of the puddle with your clean, damp brush—it will absorb the excess instantly without scrubbing.
4. Hands Off While Drying: Never touch a wash that has started to dry. Manipulating half-dry acrylic wash is the fastest way to cause coffee-stain rings and ugly tide marks.
5. Let It Cure Fully: Depending on pigment load, temperature, and humidity, washes take longer to dry than standard paints. Wet areas look darker and glossier than they actually are—reworking them too early leads to over-application.
Choosing Wash Colors by Material (Not Just Black)
While black wash (Nuln Oil style) is popular, it is not a universal solution. A heavy black wash on light skin can make it look dirty and harsh. Over gold, it destroys the metal’s warm brilliance. Choosing a colored wash yields far more natural results and gives you total control over the mood of your miniature.
| Material / Area | Recommended Wash Colors | Expected Result |
| Human Flesh | Reddish-browns, soft sepias, heavily diluted dark flesh tones | Soft, realistic muscle and feature definition |
| Gold, Bronze & Leather | Deep rich browns (Agrax style) | Warm depth without turning the material grey |
| Steel, Silver & Machinery | Blacks, cold greys, or dark chocolate browns | Realistic clean, oiled, or weathered metal look |
| Red Fabric | Maroon, burgundy, or dark brown washes | Deep, velvety shadows |
| Blue Fabric | Dark blues or deep purples | Vibrant, cold shading |
| Green Fabric | Deep forest greens or dark earth tones | Natural, organic shadow contrast |
Weathering Terrain and Scenery
When painting terrain, you can be bolder:
-
A brown wash on stone simulates dirt and dust buildup.
-
A green wash near lower sections suggests moss and moisture.
-
Concentrated black wash around windows, cracks, and pipes creates dramatic focal depth.
The goal is to tell a story through environmental color. A desert ruin weathers completely differently than a swamp fortress.
All-Over Wash, Recess Shade, and Glazes/Filters
Depending on your goal, you can utilize washes in three distinct ways:
-
All-Over Wash: Covers an entire area completely. Best for high-relief miniatures, infantry swarms, skeletons, monstrous hide, engraved weapons, chainmail, wood, and stone. Watch broad surfaces to avoid pigment pooling.
-
Recess Wash (Selective Shading): Applied exclusively where shadows exist. Perfect for display characters, vehicles, smooth cloaks, and models with delicate blends. It preserves bright highlight areas while adding crisp outlines.
-
Filters / Glazes: A heavily diluted, transparent tint applied thinly across a broad area. It unifies colors, alters color temperature, or smooths transitions without settling heavily into cracks (e.g., a faint warm yellow filter over grey stone to soften stark contrasts).
Diluting Commercial Washes
AK Interactive shade paints are ready to use straight out of the pot, but you are not obligated to use them at full strength.
-
Water vs. Acrylic Medium: Diluting with pure water thins the mixture, but too much water breaks pigment surface tension, causing chalky ring patterns as it dries. Adding a drop of Acrylic Wash Medium or Thinner reduces pigment intensity while maintaining smooth flow and clean drying properties.
-
Drying Retarders: If you need longer working time to blend smooth transitions, add a tiny drop of retarder.
-
Test First: Always test your custom wash mix on a spare plastic bit, an unused base, or the underside of a miniature before committing to an important model.
Pro Tip: Keep your recipe simple. Mixing water, medium, retarder, and heavy body acrylics all at once makes it impossible to troubleshoot performance issues. Tweak one variable at a time.
Common Wash Errors and How to Fix Them
1. Excessive Wash Pooling
-
The Fix: Wick away excess wash immediately while still wet using a damp brush. If a dried blotch forms on a shoulder pad, apply a thin, semi-transparent layer (glaze) of your original base color over the stain to smooth it out before highlighting.
2. Tide Marks (Coffee-Staining)
-
The Fix: Always push pigment toward the deepest recesses with your brush stroke, rather than letting a puddle rest on flat surfaces. Tilting the miniature allows gravity to draw the wash precisely where you want it to settle.
3. Relying Exclusively on Black Shade
-
The Fix: Avoid shading every material on a figure with black. Reserve pure black washes for mechanical recesses, gun barrels, deep metallic separations, and heavy grease effects. Use color-matched shades for everything else.
4. Stopping After the Wash Phase
-
The Fix: A wash is an intermediate step, not the final touch. Once dry, layer your original base color back over raised surfaces (cheekbones, knuckles, weapon edges, fabric folds) and highlight the top edges. The sharp contrast between deep recess shadows and bright edges brings the miniature to life.
Practical Batch-Painting Workflow
To paint an entire unit efficiently without wasting time:
1. Base Coats: Apply base colors across all models in a single run (flesh, cloth, leather, metal, bases).
2. Material Washes: Apply targeted washes by material type. Let each area dry completely before working on adjacent zones to prevent color bleeding.
3. Tidy-Up & Highlights: Quickly layer base colors back onto raised details or apply a light drybrush over textured areas.
4. Final Details: Finish fine points such as eyes, insignia, edge highlights, and base rims.
By adopting this systematic workflow, you minimize downtime, prevent accidental color bleeding, and guarantee visual consistency across your entire army.