
 Español

How to paint eyes on miniatures without ruining them
- 06/28/2026 17:42:20
- Home , Assembly and Painting Guides
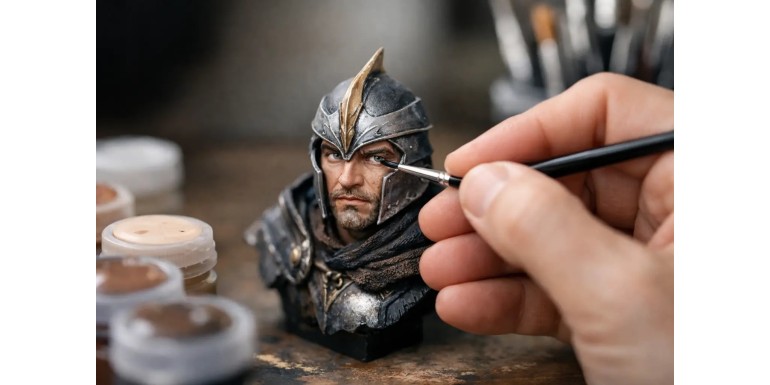
There are two moments that test any miniature painter: the face and, within the face, the eyes. If you are looking into how to paint eyes on miniatures, you’ve probably already experienced getting a decent armor job done only to ruin everything with a cross-eyed, oversized, or downright terrifying stare. The good news is that it’s rarely a lack of talent. Usually, it’s just a mix of scale, workflow order, and unrealistic expectations.
Painting eyes isn't about making a perfect, scaled-down, real-life human eye. It’s about creating the right illusion at the distance the miniature will be viewed. On a gaming piece, what works on the tabletop isn’t always the same thing that looks good in a macro photo. Understanding this saves a lot of repainting.
How to Paint Eyes on Miniatures Without Fighting the Scale
The most common mistake is overpainting. On many 28mm or 32mm miniatures, a full eye with white sclera, iris, pupil, and defined eyelids simply won’t fit without exaggerating the face. If you paint too much white, the miniature looks startled. If the black dot is poorly centered, it looks cross-eyed. And if you try to correct it over and over, you end up thickening the eye socket with layers of paint.
That’s why it’s best to decide beforehand what level of detail the miniature actually needs. For gaming, a well-placed shadow in the socket and a light line or a tiny dot hinting at the eye is often enough. For display pieces or important characters, it’s definitely worth sharpening things up. It’s not a matter of doing it better or worse; it’s about adapting your effort to the result you want.
The sculpt also plays a huge role. Some faces have deeply defined eyes that make the job easy, while on others, almost everything depends on your brush. If a miniature has a soft or poorly defined face, forcing a highly detailed eye usually makes it look worse.
The Right Order Matters More Than a Steady Hand
Many problems arise from trying to paint the eye at the very end, once you’ve already finished the skin. It can be done, but it forces you to work in a tiny gap with zero margin for error. The most practical approach is to paint the eyes before finishing the face. First, apply the base color of the face, then work on the eye, and finally clean up and outline using the skin tone.
This order gives you something incredibly valuable: control. If you slip up, you can fix it with skin color around the edges. If the eye ends up too big, you can bring the size back down by closing it in with the eyelid color. It is much easier to reduce the size later than to hit it perfectly on the first try.
Your paint choice should also help you. If it's too thick, it won't flow and will leave texture. If it's too thinned down, it will bleed into places you don't want. For eyes, you generally want a mix with good coverage but high fluidity—something that flows off the brush without pooling into a droplet. You don't need to load much paint here. In fact, the less paint on the tip, the better.
Which Brush and Posture Actually Help
You don’t need the smallest brush in the world. This often surprises people at first. A high-quality brush with a sharp point, even in a size 0 or 1, usually works better than a tiny brush that holds no paint and offers worse control. The important thing is that the tip snaps back nicely.
Your posture matters just as much as your tool. Brace your hands against each other, rest your elbows on the table if you can, and bring the miniature up to eye level. If you paint eyes with your arms floating in the air, you are leaving the result up to luck and a shaky hand. A miniature holder or handle also helps immensely, mostly to avoid touching areas you’ve already painted.
Your lighting should come from the front or slightly from the side, but without casting a harsh shadow directly over the face. It seems like a minor detail until you try to center a pupil with half the eye socket draped in shadow.
A Simple Method for Painting Eyes on Miniatures
If you want a reliable method, start with a simple one. First, paint the eye socket with a dark tone. It doesn't necessarily have to be pure black. A very dark brown or a deep grey usually looks more natural, especially on warm skin tones. This shadow defines the socket and provides separation.
Next, place a small horizontal line in an ivory or off-white tone inside the socket. Off-white is better than pure white, as pure white stands out too harshly at small scales. The line doesn't need to fill the entire socket. Leave a dark border around it if the sculpt allows.
Then, add the pupil with a dot or a very fine vertical line, not a perfect circle. On many miniatures, a centered dark line works better than trying to paint the iris and pupil separately. Plus, it reduces the risk of making them look cross-eyed. If both eyes are looking at the exact same point and are roughly the same size, you’ve already won the battle.
Once that is dry, go back with your skin color and redefine the upper and lower eyelids. This is where the eye truly starts to blend in. Many eyes that look like a total disaster before this step end up looking perfectly usable afterward.
Common Mistakes and How to Fix Them
The "bug-eye" effect (an eye that is way too large) is the classic mistake. The solution isn’t to scratch everything off and start from scratch, but rather to close up the space using the skin tone. Slowly eat away at the white from the top or bottom until it regains its proper proportions.
A cross-eyed miniature usually happens because the pupils are at different heights or pushed too far toward the outer edges. At small scales, it works best if the gaze is straight ahead or slightly to the side, but visibly identical in both eyes. If you are in doubt, center them a little more than your instinct tells you to. A tiny misalignment stands out a lot.
Another frequent error is using pure black to outline everything. It hardens the expression too much and creates a cartoonish effect, unless that’s the specific style you are going for. It might fit dark fantasy or comic book styles, but on a more realistic human, it’s better to save pure black for very specific details.
It’s also best to avoid fixing things while the paint is still wet over and over again. When you push too hard on the same area, you tear up the previous layer, create texture, and lose definition. It is better to let it dry, take a look, and fix it calmly.
When Not to Paint the Full Eye
Not every miniature needs a complete eye. For rank-and-file troops, tiny open helmets, or figures meant strictly for the gaming table, darkening the socket and hinting at a tiny highlight at the bottom or center is often enough. At actual gaming distance, this reads as an eye without requiring surgical precision.
This approach also works incredibly well on older, bearded, or rugged miniatures, where the shadow beneath the brow already adds plenty of character. A hinted eye can look much more believable than a perfectly outlined but oversized one.
On the other hand, for busts, heroes, or display pieces, spending more time is usually worth it. There, you can work on the white with subtle transitions, define the upper eyelid better, and even hint at color in the iris. But even in those cases, less is usually more.
The Difference Between a Gaming Mini and a Display Piece
It helps to be honest about your goal here. If the miniature is going to spend most of its time three feet away on a table with terrain, prioritize legibility and cleanliness. A simple, well-placed eye is worth more than a technically ambitious but sloppy one.
If the miniature is for a competition, a photo, or a display case, the standard changes. That’s when it pays off to refine transitions, symmetry, and expression. But that requires more time, better visual magnification if you need it, and accepting that not all sculpts make the same finish easy.
There is nothing wrong with saving your finest work for special characters. In fact, it’s a great way to maintain momentum on an entire army without getting bogged down on every single head.
How to Practice Eyes Without Ruining Good Characters
The best practice doesn't happen on your best miniature. It works much better to grab spare heads, test minis, or even pre-primed figures that you don’t mind repainting. Repeating ten eyes in a row teaches you more than spending an hour fixing a single one.
It also helps to practice the entire sequence, not just the pupil. Shadow, off-white, dark dot, and skin cleanup. This cycle is what builds muscle memory. If you only try to improve the tiny black dot, you are only tackling half the problem.
And if you use different paint ranges, pay close attention to one specific thing: how they flow off the tip. Some are excellent for general coats but less comfortable for fine detail. In a specialized shop like Terrainandminis.com, it makes perfect sense to look for paints and brushes designed specifically for miniatures rather than generic equivalents, because in this kind of detail work, the difference really shows.
Short Patience, High Standards
Knowing how to paint eyes on miniatures doesn't mean painting every eye with the exact same level of detail. It means understanding what each figure needs, working in the order that gives you the most control, and correcting mistakes without making the area worse. This shift in mindset is usually what makes the difference between fighting with every face or tackling it with confidence.
The next time an eye doesn't turn out perfect, don't stare at it from two inches away or under a cruel macro photo. Place the miniature at gaming distance, look at it in context, and decide if it truly needs another pass. More often than not, what looked like a disaster just needed a better-defined eyelid and fewer demands on your part.






