
 Español

How to Glue Resin Scenery: Preparation, Adhesives, and Assembly Techniques
- 09/09/2026 10:35:58
- Home , Assembly and Painting Guides
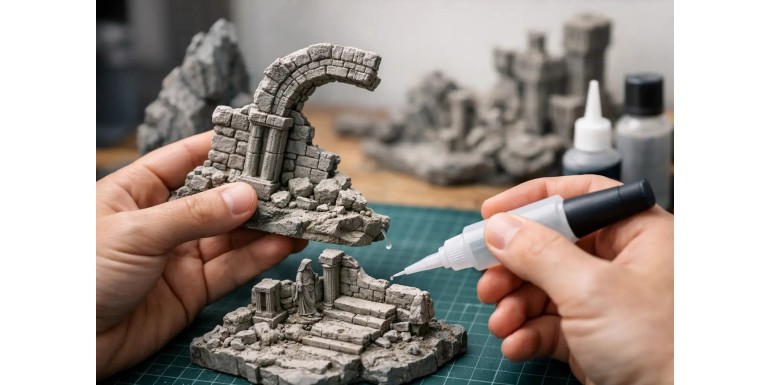
A resin ruin with a tower that snaps off when moved, a crooked scenic base, or a joint coated in excess dried glue are all-too-common frustrating experiences. Learning how to glue resin terrain and scenery isn't just about choosing a strong adhesive—surface preparation, part weight, and internal pinning determine whether your terrain piece will survive intense tabletop games and transport.
Resin allows manufacturers to cast buildings, rocks, walls, and scenic details with massive volume and crisp detail. However, it does not behave like standard injection-molded plastic. Resin is far less flexible, often features uneven contact points, and can be quite heavy for large terrain kits. Taking a calm, methodical approach before opening your glue bottle pays off immensely.
Before You Glue: Clean, Prep, and Dry-Fit
Many resin pieces retain invisible traces of mold release agent from the manufacturing process. This thin greasy film stops adhesives from bonding properly, causing joints to fail cleanly after just a few hours.
 [1. Wash]                      [2. Warm Water Fix]                    [3. Dry-Fit]                         [4. Sanding]
Warm water & soap   --> Straighten warped pieces --> Check alignment & gaps --> Scuff contact areas
-
Wash Your Pieces: Scrub all components in warm water using mild dish soap and a soft toothbrush. Rinse thoroughly with clean water and let them air dry completely.
-
Avoid Boiling Water: Excessive heat can warp resin—especially thin components like balconies, signs, beams, or decorative trim. If a piece arrives slightly bent, submerge it in warm water, gently bend it back into shape, and hold it straight while it cools down.
-
Dry-Fit Everything: Test-fit all parts without glue first. Check where the surfaces actually make contact, identify mold lines or flash blocking the fit, and note the orientation of every wall, platform, or pillar. In complex building kits, it is easy to invert a seemingly symmetrical piece and discover the mistake only after the glue has cured.
-
Scuff smooth joints: Use fine-to-medium sandpaper (180 to 320 grit) on smooth contact points. You don't need to sand away detail—just scuff the surface to give the adhesive mechanical grip ("keying"). Dust off the area before applying glue. This step is essential for large base plates, massive rocks, and structural wall joints.
How to Glue Resin Terrain Based on the Joint Type
The ideal adhesive depends on the surface area and the structural stress the joint will endure. There is no single universal glue for all terrain projects, and combining methods often yields the strongest results.
       [ Super Glue (CA) ]             [ 2-Part Epoxy ]              [ Epoxy Putty ]
       Small details & quick         Heavy structural walls &       Filling gaps & building
         accessory bits                large rock outcrops              custom beds
1. Super Glue (Cyanoacrylate) for Small Details and Quick Fixes
Cyanoacrylate (CA glue), commonly known as super glue, is the standard choice for lightweight details: crates, sandbags, skulls, pipes, ruin debris, or small scenic accessories. It also works well on flush, tight-fitting resin-to-resin joints.
-
Less is more: Applying too much super glue slows down cure time, weakens the joint, and causes messy squeeze-out.
-
Control: Use a gel-based super glue for small gap-filling control rather than thin liquid glue.
-
Accelerators: An activator spray speeds up assembly, but use it sparingly; overusing it can make the cured glue brittle or leave a white frosty residue on the resin.
Limitation: Super glue lacks shear strength. If you use super glue alone to attach a heavy wall to a base or hold up a tall tower, it may hold initially but snap cleanly upon a lateral impact.
2. Two-Part Epoxy for Heavy Structural Kits
For multi-part buildings, massive rock formations, portals, statues, or elevated platforms, two-part epoxy resin adhesive is the safest choice. As it cures, epoxy fills micro-gaps between uneven surfaces and forms an ultra-tough bond that withstands stress far better than super glue.
-
Choose an epoxy with a reasonable working time (5–15 minutes). Fast-curing "5-minute" epoxies are handy for small fixes, but larger structures require extra time to align walls, adjust angles, and clean up squeeze-out.
-
Apply epoxy to both contact surfaces, press the parts together, and secure them with painter's tape, rubber bands, or clamps while curing.
Note: Epoxy is not a substitute for proper dry-fitting. If a large gap exists between two pieces, fill it with putty rather than relying purely on a thick layer of glue.
3. Epoxy Putty (Green Stuff / Milliput) for Gap Filling
Epoxy putty is invaluable when resin parts don't meet flush. It can be used to build a custom resting bed under an uneven rock, reinforce column bases, or blend scenic resin elements smoothly into MDF, PVC, or plastic gaming bases.
Pro Technique: Glue the main structure in place using super glue or epoxy. Once stable, press a thin snake of epoxy putty around the joint seam. Texture the wet putty with sand, gravel, or cork. This conceals the join seamlessly while significantly increasing the glued surface area.
4. PVA (White) Glue: For Texturing, NOT Structural Bonding
PVA or craft glue is ideal for attaching sand, static grass, ballast, and scenic pigments. However, PVA should never be used to bond resin to resin. As it dries, it forms a flexible surface skin that readily peels off smooth, heavy resin under the slightest impact. Save PVA exclusively for post-assembly ground texturing.
Reinforcing High-Impact Joints (Pinning Techniques)
Tabletop terrain doesn't sit safely behind glass—it gets bumped, packed into storage bins, leaned on during matches, and occasionally dropped. Heavy or top-heavy resin structures demand internal reinforcement.
  [1. Drill Holes]          [2. Insert Metal Pin]          [3. Epoxy Bond]
(Hand drill both sides)   (Brass rod or paperclip)    (Locked against impacts)
Pinning Resin
Pinning involves inserting a rigid metal rod across a joint line to lock both pieces together structurally:
1. Drill matching holes into both contact faces using a hand pin vise.
2. Cut a short length of brass rod, straight paperclip, or sturdy wire.
3. Glue the pin into the holes using epoxy or super glue.
This metal core prevents the parts from twisting or shearing off when bumped. Always pin:
-
Roof-supporting pillars
-
Towers mounted on flat bases
-
Top-heavy rock spires
-
Resin trees and overhanging overhangs
Modular Considerations
For modular ruins, consider not gluing certain upper floors or roofs permanently. Leaving sections unglued makes storage much easier and lets you reconfigure your gaming table layout between matches.
To widen the structural footprint of glued walls, add physical and visual weight around the base joint. Scattering rubble, dirt patches, barrels, or fallen bricks around the join masks the seam while widening the physical anchor point.
Common Resin Assembly Mistakes to Avoid
-
Gluing Unwashed Resin: If a joint breaks cleanly with zero glue residue sticking to one side, mold release agent is almost always the culprit.
-
Assembling in "Mid-Air": Always work on a flat, level surface (like a glass mat or cutting board) so walls remain square and floors sit level.
-
Super Glue "Frosting" (Fuming): Excess super glue releases cyanoacrylate vapors that leave a white hazy ring on nearby surfaces. This is especially noticeable on pre-primed pieces. If this happens, allow it to cure completely, gently scrape/sand the haze off, and re-prime.
-
Gluing Over Paint: Never glue painted resin surfaces together. The adhesive will bond to the paint layer, not the resin underneath—a light bump will tear the paint right off the resin. If you must pre-paint hard-to-reach interiors, mask off contact points with tape beforehand or scrape the paint back down to bare resin before final assembly.
-
Rushing Curing Times: Just because a piece stands upright on its own doesn't mean the bond has fully cured. Respect the manufacturer’s full cure time (especially for epoxy) before applying textures, primer, or transporting the piece.
Finishing Seams & Preparing for Primer
Once your structure is fully assembled, inspect the model under a strong side light. This harsh angle reveals hidden gaps, flash lines, and glue beads that are invisible from above.
| Terrain Style | Gap Treatment Strategy |
| Stone Ruins & Caves | Leave slight irregular gaps or fill with textured putty to mimic cracked mortar / natural fissures. |
| Sci-Fi / Industrial | Fill seams flush with smooth putty, or disguise the join line by placing a styrene panel, pipe, or rivet strip over it. |
Once your construction is rock-solid, gap-filled, and primed, you will have a durable, gaming-ready terrain piece built to survive real tabletop play. Spending a few extra minutes cleaning, dry-fitting, and pinning now prevents an embarrassing structural breakdown during your next big match!






