
 Español

How Long Does UV Resin Take to Cure on Miniatures?
- 11/05/2026 08:41:04
- Home , Assembly and Painting Guides
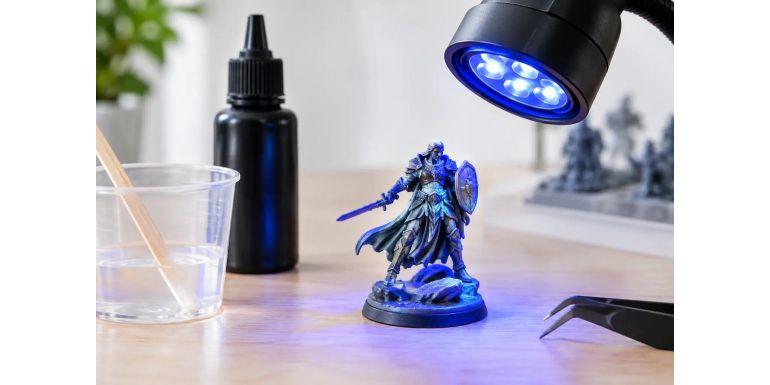
A clear layer of water on a miniature base can go from looking like a blob of plastic to a convincing effect in just a few minutes. The big question is how long UV resin takes to cure when used on miniatures, and the short answer is: typically between 30 seconds and 5 minutes per layer. The useful answer is that it depends on your lamp, the thickness of the application, the color of the resin, and how you have prepared the scene.
In modeling, UV resin works exceptionally well for still water, puddles, crystals, lenses, alien slime, liquids in containers, small repairs, and glossy details. It is not a deep-pour casting resin; its greatest advantage is that it cures rapidly under ultraviolet light, but it needs to be applied methodically to avoid soft, sticky, or bubble-filled areas.
How Long UV Resin Takes Based on the Application
For a thin, transparent layer of approximately 1 mm, a suitable UV lamp usually takes between 30 and 120 seconds. It is best to check the cure at 30 seconds and add short cycles if the surface still feels flexible. With a powerful UV flashlight, the process may take 2 to 5 minutes because the beam covers a smaller surface area and does not always illuminate all angles with the same intensity.
Sunlight also cures UV resin. On a clear day, it can harden a thin layer in just a few minutes, but it is not the most controllable method. Intensity changes with the hour, season, cloud cover, and the type of light hitting the piece. For a single display base, this might be enough; for replicating results across an entire army, a UV lamp provides much greater consistency.
The time indicated by the manufacturer is a starting point, not a universal guarantee. Two different resins can react differently under the same lamp. If you change brands, pigments, or your light source, always run a test on a spare base before applying the effect to a finished miniature.
Thin Layers: The Safest Method
On most 25 mm to 60 mm bases, a thin layer of UV resin is the most reliable option. Spread it with a toothpick, a silicone tool, or the tip of a disposable brush, making sure it reaches the edges without covering textures you want to keep dry. Next, cure for 30–60 seconds and check that there are no liquid spots.
If you want more volume, repeat the process. Two or three 1 mm layers cured separately usually yield a better result than trying to fill a 3 mm depression all at once. Furthermore, layering allows you to place elements in between: reeds, stones, skulls, submerged vegetation, or battle debris.
Thick Layers and Deep Effects
UV light must pass all the way through the resin to harden it. When a pour is too thick, the top layer can become rock-hard while the interior remains uncured. This causes cracking, a cloudy finish, or a soft pocket that collapses when you press the base days later.
If you need to simulate depth in a river, a swamp, or an industrial pool, first create the illusion using paint and texture. Paint the bottom darker in deep areas, add green, brown, or blue transitions, and save the resin strictly for the surface film. For large cavities, a two-part casting resin may be more appropriate than UV resin, though it requires much longer curing times.
What Changes the Curing Time?
-
Lamp Power: The most obvious factor. A lamp designed for curing nail gels can work for UV resin, provided it emits at a compatible wavelength. Many resins are formulated to cure around 365–405 nm. It is not enough for the lamp to simply look violet to the naked eye; it must emit real UV radiation and sufficient intensity.
-
Distance: Proximity matters. A few centimeters away from the piece, the lamp concentrates light much better. If you place a base at the bottom of a curing box or under a lamp that is positioned too high, it will need more time. On pieces with high relief—such as ruins, trees, or scenic bases—illuminate from multiple angles to prevent shadow zones from remaining uncured.
-
Pigments: A common limitation. Clear resin cures easily because light passes right through it. When you add ink, paint, powder pigment, or artificial snow, you reduce that light penetration. A lightly tinted mix for swamp water can cure fine in thin layers; an opaque mix for lava, blood, or thick mucus must be applied in even thinner layers.
-
Temperature: In a cold workspace, resin becomes more viscous and bubbles take longer to escape. You do not need to heat it aggressively: simply work in a warm room and leave the closed bottle at room temperature for a few minutes before use. Avoid placing the resin near direct heat sources, as it can yellow, shrink, or react irregularly.
How to Know If UV Resin Is Fully Cured
A properly cured surface should not depress when gently poked with a toothpick. It must retain its shape, emit no strong liquid resin odor, and leave no marks when lightly pressed on a less-visible edge. If the layer shifts, feels rubbery, or remains wet underneath a glossy top skin, it needs more light.
The sticky-touch issue deserves a separate mention. Sometimes the resin has hardened, but a slightly tacky surface film remains due to oxygen inhibition. First, try curing it for another 30–60 seconds while rotating the piece so it receives side light. If it remains sticky, check the manufacturer's instructions: some formulas require wiping the inhibition layer with isopropyl alcohol, while others should be completely dry to the touch without cleaning.
Never handle a piece that only appears cured on top if you have applied a lot of material. Give it time and check the sides. On a miniature base, an uncured interior can later seep through a crack, ruin your paint job, and destroy a finished base.
Common Mistakes When Using UV Resin on Bases
1. Applying too much at once to save time: UV resin rewards controlled, thin layers.
2. Improper angles: Curing with the miniature positioned so a wall, rock, or bush casts a shadow over the effect. If the design allows, cure from above first, then tilt the base to illuminate the sides.
3. Trapped bubbles: Stirring pigments too fast or pushing the nozzle down too quickly introduces air. Let the piece rest for a few seconds before curing and use a toothpick to drag bubbles to the edge. For very small details, a slowly applied thin layer eliminates this issue entirely.
4. Dirty surfaces: Never apply UV resin over dust, grease, or wet paint. Water effects look much cleaner and deeper over a base sealed with varnish. If you are adding vegetation, sand, or pigments in contact with the resin, fix them down with PVA glue first and let them dry completely.
A Reliable Workflow for Miniatures
1. Prep and paint the background before opening the resin. For a puddle, mark the deep area with dark tones and reserve the banks for mud, grass, or debris. Seal the paint if you used washes or pigments that might reactivate.
2. Apply a very thin first layer and cure.
3. Add submerged elements if needed (like a stone or a tuft of grass) and fix a second layer right on top.
4. Finish the details by creating ripples using a clear gel or a tiny amount of resin placed in ridges, always curing in stages. This order prevents details from floating, shifting, or getting trapped under a cloudy mass.
5. Safety first: Work with nitrile gloves, protect your workspace, and avoid skin contact with uncured resin. Good ventilation is still recommended, even with small quantities.
6. Once hardened, varnish or paint the edges of the base to match your army's or diorama's overall look.
A UV lamp, thin layers, and a quick test run are all it takes to turn this material into a precise modeling tool. Start with a puddle on a test base: once you master thickness and curing time, you will be able to replicate the exact same effect with confidence across rivers, sewers, display cases, and gaming tables.