
 Español

How to Use Static Grass Correctly
- 07/11/2026 09:57:33
- Home , Assembly and Painting Guides
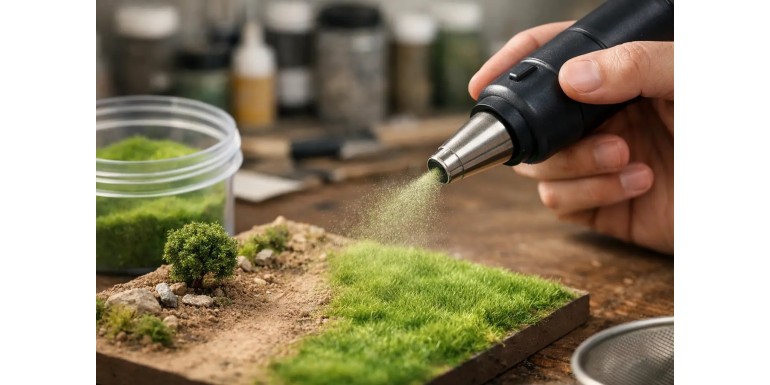
If your static grass looks flat, clumped, or patchy, the problem is rarely the material itself. It usually comes down to the glue, the amount applied, or the timing in the process. Understanding how to use static grass correctly marks the difference between a base that just "gets by" and a surface that truly adds scale, volume, and natural realism to your miniature or terrain.
Static grass works well because, when applied the right way, its fibers stand up instead of laying flat like regular flock. They create vertical texture and break up that unnatural look of a surface painted with sawdust. However, not every project requires the same result. An infantry base, a wargaming hill, or a display diorama each need different densities, lengths, and blends.
How to Use Static Grass Correctly from the Ground Up
The first common mistake is applying it onto a poorly prepared surface. If the base or scenery piece is smooth, glossy, or dusty, the glue won't grip properly, and the fibers will distribute unevenly. Before you start, you should have the base textured and painted. Even if it ends up mostly covered, a dark brown, earth, or dull green background ensures any gaps don't look artificial.
The glue matters more than it seems. For standard work, PVA glue slightly diluted with water works well, but it must not be too runny. If you add too much water, the grass sinks and loses its verticality. If it is too thick, it creates lumps and glossy patches. The sweet spot is a mix that flows easily when spread but still has body.
Applying it with control also changes the outcome. If you cover the entire surface evenly, the finish ends up looking like a carpet. In nature, even in dense meadows, there is variation. Leave some areas with less product, reserve parts for bare earth, and think about where denser growth makes sense. Around rocks, trunks, ruins, or uneven ground, irregularity always looks better than a uniform layer.
Application Methods Based on the Tool
You can apply static grass using the pinch method, a small sieve, or a static grass applicator. All three methods work, but they offer different levels of control.
The pinch method is the most basic approach and remains valid for small bases or beginners. The result depends heavily on the drop height and avoiding crushing the fibers with your fingers. The best approach is to drop a generous amount onto the glue and then gently tap the bottom of the piece so the fibers settle without laying flat.
Using a sieve or fine shaker improves distribution significantly. The fibers fall more loosely, clump less, and make it easier to avoid piles. For gaming scenery, it is a practical, fast, and sufficient method in most cases.
A static grass applicator is in a different league, especially if you are working on gaming boards, large dioramas, or want longer, upright grass. The electrostatic charge helps orient the fibers vertically. Even so, it won't work miracles if the glue is poorly applied or the surface is oversaturated. Having a better tool does not replace a well-planned base.
Choosing Length, Color, and Density
Not all static grass fits every job. Short fibers, like 2 mm, work exceptionally well on small or medium-scale bases where you want to suggest grass without covering up too much of the paint job. 4 mm fibers are highly versatile for general terrain. 6 mm or longer fibers require more care; an excess can throw off the proportions of the scene, especially in 28 mm scale if used without blending.
Color choice also requires proper judgment. A completely uniform green usually looks fake. On the tabletop, it might work from a distance, but up close, it ruins the realism. Blending two or three similar tones usually delivers a much more credible result. A medium green mixed with some dead grass tone and a touch of darker green creates variation without overcomplicating things. If you also add small patches of bare earth or fine flock between the grass, the whole piece gains depth.
Density depends on the environment you want to represent. On a military base, you often want to leave room for mud, churned earth, or rocks. On a fantasy board or a damper scene, you can load it up more. The problem isn't using a lot of grass; it is making it all look identical. Visual monotony is what makes a surface look artificial.
How to Avoid Common Mistakes
One of the most frequent errors is blowing away the excess too soon. If the glue is still wet, you drag away useful fibers and leave bare patches. It is better to wait a bit, let it grip, and then tap off the excess gently or flip the piece upside down to recover the material.
Another classic mistake is pressing the fibers down with your finger to "fix" them. This flattens them completely. If you want to improve contact, tap the bottom of the base or drop the grass from a slight height. The goal is for it to land in the glue without being crushed.
You also need to watch out for gloss. Some glues dry with a satin finish, and if they peek through the grass, they break the illusion. This is why painting the base beforehand and avoiding glue build-up helps so much. If gloss still appears, a highly controlled layer of matte varnish at the end can fix it, but avoid soaking the fibers.
Over-cleaning is another less-discussed issue. Some hobbyists trim, brush, or handle the area too much once dry. In certain cases, reducing height or removing loose fibers helps, but overdoing it causes the grass to lose its natural look. A bit of irregularity always adds value.
Layers, Blends, and a More Realistic Finish
If you want a convincing result, working in a single layer usually falls short. A first application can serve as a general base. Then, once the piece is completely dry, you can add small patches of another tone or a different length. This layering creates visual depth and prevents a flat look.
This is where it pays off to think like a modeler rather than just someone "covering a base." A dirt path needs a transitional edge. An abandoned ruin requires uneven growth. A hill designed for gaming needs durability, so you might want to prioritize slightly shorter, well-secured fibers over a very tall but fragile finish.
Adding other materials also helps. A bit of fine flock, tufts, dead leaves, or pigment in specific areas breaks up the uniformity. You don't need to crowd the piece with effects. In fact, static grass looks best when it shares the space with other elements instead of trying to do all the work alone.
Bases vs. Scenery: Different Approaches
On bases, the margin for error is slim. Every element competes with the miniature, so the grass should complement it, not steal the spotlight. It usually works best in small clusters, allowing the model’s silhouette to stand out clearly without covering boots, rocks, or narrative details.
With scenery, you can afford broader transitions, tone shifts, and denser areas. However, another factor comes into play: durability. If it is a gaming piece that will be handled frequently, ensuring a strong bond is essential. In these cases, some hobbyists apply a very light secondary mist of adhesive or a specific scenic cement, always taking care not to flatten the fibers.
For modular boards, consistency is also key. This does not mean everything must look identical, but the tones, heights, and coverage should maintain a shared logic across pieces. If each module uses a different green or a completely unrelated texture, the battlefield loses its cohesion on the table.
When It Pays to Redo a Section
Sometimes, the best decision is to start over. If a section ends up with lumps, gloss, or an awkward density, building on top of it can make it worse. Removing the loose material, letting it dry completely, repainting if necessary, and reapplying usually gives a better result than trying to save a problematic base with more material.
This becomes very noticeable in large projects. A poorly handled patch on a single base might pass unnoticed. On a hill or a road, it stands out immediately. Working in sections and checking each stretch before moving on saves more time than it seems.
In a specialized shop like Terrainandminis, where hobbyists look for materials designed for bases, scenery, and dioramas, you quickly realize there is no single "correct" grass. The correct choice is the product that fits the scale, the use, and the finish you are looking for.
The best result doesn't come from throwing more fiber at it, but from deciding where it goes, how much you need, and what role it plays within the scene. When static grass is used with that intent, it stops being a filler and becomes a real part of the terrain.






