
 Español

How to Paint Orc Skin: Step-by-Step Miniatures Guide
- 11/11/2026 13:44:17
- Home , Assembly and Painting Guides
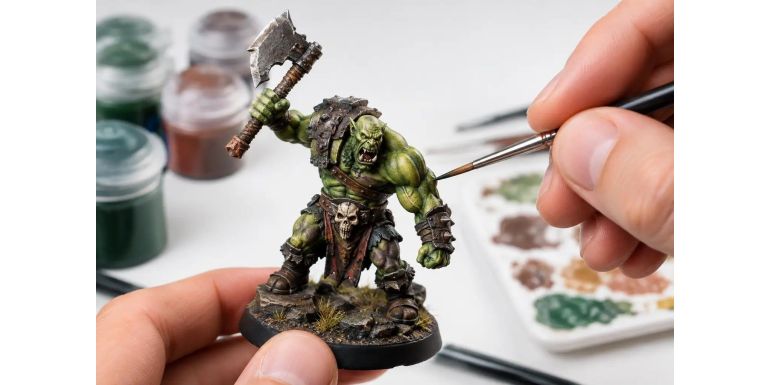
A poorly executed orc skin is usually given away from a distance: flat green, heavy black shadows that make everything look dirty, or highlights so stark they look like military camouflage. Knowing how to paint orc skin is, above all, about controlling contrast without losing that feeling of weathered, gritty, battle-hardened flesh. You don’t need ten different paints or advanced techniques right from your first basecoat.
The key is deciding what kind of orc you are painting. A dark fantasy warrior might call for muted, earthy greens; a more classic horde works well with saturated greens; and a savage-looking orc might look best with an olive, yellowish, or even greenish-gray skin tone. The paint recipe shouldn't overpower the miniature—it should serve the army, the setting, and the viewing distance on the gaming table.
How to Paint Orc Skin: Choose Your Tone Before You Start
Before preparing your wet palette, look at the miniature's armor, cloths, and base. If rusted metals, dark leather, and mud predominate, a yellowish-green or brownish-green skin will fit right in. If the models wear red, yellow, or orange clothes, it's best to dial back the skin's saturation to avoid turning the figure into a chaotic mass of intense colors.
A black primer allows for deep shadows and an aggressive finish, especially on miniatures with plenty of straps, plates, and details. With a gray primer, you'll get a more neutral and readable result. White or zenithal priming is useful if you are chasing vibrant greens, but it requires more care: poorly worked shadows will stand out immediately.
For a gaming unit, the most practical approach is to work with a family of tones, not a single identical green. You can use the same base color across the entire regiment and slightly vary the mix with brown, yellow, or gray on individual warriors. This maintains visual coherence without creating a block of clones.
A Reliable Recipe for Base, Shade, and Highlight
The safest way to paint orc skin is to apply a matte basecoat, reinforce the volumes with controlled shading, and recover exposed areas through successive layers. Instead of relying on a heavy all-over wash, it is much better to use washes moderately. Excessive washing can dull down the midtones and leave glossy rings on large muscle groups.
-
Basecoat: Start with a desaturated mid-green. Mixing a green with a small amount of leather brown, beige, or gray produces a much more natural base than a pure, vibrant green. Thin your paint enough so that it flows smoothly, but not so much that it pools in the recesses. Two thin layers usually give a clean, solid coverage while preserving the sculpt details.
-
Shading: Mix your base color with dark brown, very dark green, or a hint of muted purple. Purple works particularly well in armpits, under the jaw, between fingers, and around scars because it adds depth without turning the shadows into black holes. Apply it into recessed areas with a fine-tipped brush, or use a targeted pin-wash if you are painting a large unit.
-
Midtone Recovery: Re-establish the base color on the primary raised planes: biceps, pectorals, shoulders, cheekbones, nose, knuckles, and the tops of the feet. This step brings order to the finish. Don't try to highlight everything at once; first restore the mid-green and let the shadows stay where they belong.
Building the Highlights
The first highlight can be your base mixed with a lighter green, yellow, or pale flesh tone. Yellow creates a more sickly and aggressive skin; pale flesh creates a more organic transition; light green maintains a more traditional fantasy aesthetic. Apply this highlight to progressively smaller areas, always leaving a thin border of the previous layer showing.
The final highlight must be selective. Reserve your lightest tone exclusively for the tip of the nose, eyebrows, cheekbones, shoulders, knuckles, elbows, and raised scars. If you highlight every single muscle equally, the skin loses its visual hierarchy. On a tabletop miniature, highlights should help the pose read from a meter away, not describe every microscopic muscle fiber.
The Quick Method for Hordes
When you have twenty or forty orcs waiting on your painting tray, simplify your process without sacrificing the final look:
1. Apply a solid, consistent basecoat.
2. Give a general wash or shade in dark green or greenish-brown.
3. Recover volumes with a very soft drybrush or a quick layer over the raised details.
4. Finish with a sharper, more defined highlight on the face, hands, and shoulders.
Drybrushing works wonderfully on heavily textured skin, large monsters, and older sculpts with exaggerated muscles. On modern faces or smooth surfaces, however, it can leave a chalky finish. If that happens, use a minimal drybrush and follow up with a thinned glaze of the base color to tie the grain back together.
To save time, concentrate your finest work on characters, champions, and front-row miniatures. The rest of the unit will benefit greatly from overall contrast and a well-finished base. Unit cohesion usually matters much more than achieving a flawless blend on every single rank-and-file warrior.
Adding Skin Variation Without Breaking Unit Cohesion
Green skin gains immense credibility when you incorporate secondary color variations. Orcs don't need to be uniformly green from forehead to toe. Thin glazes allow you to shift the temperature of specific areas without covering up your previous layers.
-
Use a heavily diluted reddish or purple glaze on the nose, lips, ears, elbows, knuckles, and scars to give the impression of irritated or highly vascularized skin.
-
A brown or sepia tone on feet, shins, and hands suggests dust, dried mud, and sun exposure.
-
For particularly brutal orcs, a yellowish-green glaze around the jawline and eyes adds a sickly, toxic look without falling into neon green territory.
Scars, Tattoos, and Warpaint
Scars deserve their own treatment. If they are deep, darken the groove first with a violet-brown mix and edge-highlight one of the borders with a bright tone. If they are old and raised, use a muted pink mixed with the surrounding skin tone. Pure white rarely works: it draws too much attention and makes the scar look like a painted line rather than a healed injury.
Tattoos and warpaint should always be applied after the skin is fully finished. A black, dark red, or very muted blue design looks much more realistic if its edges are slightly irregular. Perfect warpaint might suit disciplined warriors, but for a tribal warband, leaving small chips, cracks, or worn-out patches looks far more convincing.
Common Mistakes When Painting Green Skin
-
Using an all-over black wash and calling it done: Black kills the richness of green, especially on smaller figures. A dark brown, deep green, or a violet mix provides much livelier shadows that are far easier to recover.
-
Highlighting with a bright, pure green too early: Transitions become abrupt, and the miniature takes on a plastic toy-like appearance. It's much better to step up to the final tone in two or three gradual steps. If you've gone too far, a thin glaze of the base color can pull the layers back together and smooth out the contrast.
-
Leaving the skin overly glossy: Some washes and contrast paints dry with a satin finish—useful for fresh wounds or damp areas, but ill-suited for the entire body. A coat of matte varnish restores that rugged, weathered skin texture. Leave the gloss exclusively for blood, saliva, eyes, or localized sweat.
-
Ignoring the base: Bright green skin over an intensely vibrant green grass base can lose its visual punch; against gray ruins, red earth, or dirty snow, it will pop much more. Terrain materials, pigments, and vegetation aren't just an afterthought—they dictate how the miniature's color is perceived.
The Face Sets the Orc’s Character
Even though the body occupies more surface area, the face is where both players and viewers will look for personality. Boost the contrast one extra notch around the eyebrows, nose, upper lip, jaw, and ears. You can keep the area under the eyes slightly darker and add a warm touch to the nose and lips to prevent the face from reading like a flat green mask.
Eyes work best with moderation. A tiny dot of ivory or muted yellow with a dark pupil is enough for most gaming scales. Painting eyes completely solid white can make the model look too cartoonish unless that is your specific aesthetic goal. In 28–32mm miniatures, a clear, readable expression beats microscopic detail every time.
When you finish, place the miniature next to the rest of the unit before calling it done. Sometimes skin that looks amazing in isolation turns out too bright, too cold, or too saturated for the rest of the army. Adjusting a final glaze takes seconds; redoing all the highlights when you've already painted twenty orcs does not. A simple, repeatable recipe tailored to your gaming table will always beat chasing an elusive, one-off formula.